From a Boring Blood Text to a Working Blood Simulator
How a lesson I had never quite solved became an interactive investigation of blood cells, transport, and injury
I have called this lesson “Blood: The Lesson I Haven’t Solved Yet.”
That title was not just me being dramatic. Blood is one of those topics that should be fascinating. It connects cells, body systems, transport, injury, healing, and homeostasis. Students already know that blood matters. They have seen cuts, bruises, blood tests, bandages, and scabs. There is no shortage of relevance.
Yet the lesson kept flattening into a reading about red blood cells, white blood cells, platelets, and plasma.
The text was accurate. The diagrams were fine. The vocabulary was necessary. But the learning experience still felt passive. Students could repeat that red blood cells carry oxygen, white blood cells fight infection, platelets help with clotting, and plasma is the liquid portion of blood. What they could not always do was picture those components working together as a system.
That became the design problem: How could students investigate blood instead of simply reading about it?
The problem was not the information
The original blood text contained the important science. The problem was the distance between the words on the page and the processes students were supposed to imagine.
“Blood transports materials” sounds simple until students have to explain what is being transported, where it goes, what stays inside a blood vessel, and what crosses into nearby tissue. “Platelets help stop bleeding” is easy to memorize, but it does not automatically produce a mental model of a damaged vessel, leaking plasma and cells, platelet activation, fibrin formation, swelling, cleanup, and continued delivery of oxygen and nutrients.
I did not want another animation that students watched once and forgot. I wanted a model they could manipulate, pause, question, and use as evidence.
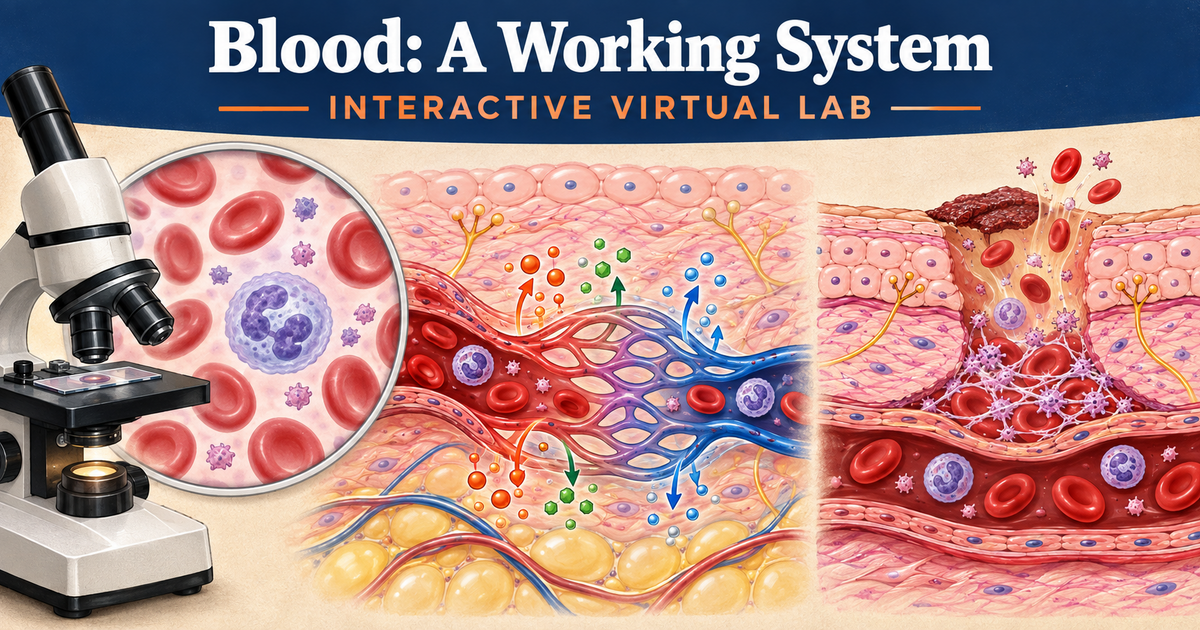
So we started building Blood: A Working System, an interactive virtual lab organized around four connected investigations.
First, students prepare and examine blood
The first part asks students to prepare a virtual blood smear. A trained laboratory professional collects and labels the sample, while students control the steps involved in placing the drop, spreading the sample, staining the slide, selecting magnification, and adjusting focus and light.
This was important because I did not want the microscope image to appear magically. Students should understand that what they see under a microscope depends on how the sample was prepared and how the instrument was adjusted.
Once the slide is ready, students can compare human blood with blood from a dog, chicken, frog, and fish. Mammalian red blood cells appear round and lack nuclei, while the nonmammalian examples show oval, nucleated cells. The comparison gives students something meaningful to notice instead of asking them to stare at an image and somehow know what matters.
Next, students investigate blood as a mixture
The second part moves from the microscope to a centrifuged tube of blood. Students separate the sample into plasma, the thin buffy coat containing white blood cells and platelets, and the packed red blood cell layer.
They can examine each layer closely and then remix the sample. That interaction supports an idea that is easy to miss in a textbook: whole blood may look uniformly red, but it remains a physical mixture of different components. Mixing does not make those components disappear, and separation does not create them. They were present the entire time.
This section also helps students connect scale. A white blood cell that is difficult to find in a typical smear becomes obvious when the thin buffy coat is isolated. Tiny platelet fragments can be compared with much larger white blood cells. Plasma is no longer treated as empty space; it is the water-based material carrying dissolved nutrients, electrolytes, proteins, and wastes.
Then, blood has to travel somewhere
The third part follows blood through capillary beds in skin, muscle, and bone tissue. Students can trace gas exchange, nutrients and waste, or water and electrolytes.
This section took several rounds of revision. At one point, the capillary looked too cartoonish against realistic tissue. At another point, the blood cells seemed to float through open space instead of following the vessels. The exchange particles were moving, but their direction was not clear enough. Students might have seen motion without understanding what was entering the blood, leaving the blood, reaching the tissue, or being carried away.
We eventually shifted to a consistent illustrated tissue style and tightened the blood-cell paths through the capillary network. The exchange now happens along the outer edges of the capillary bed, where the direction is easier to follow. Students can see oxygen and nutrients move toward living tissue, carbon dioxide and other wastes enter the bloodstream, and water and electrolytes move in either direction depending on conditions.
The goal is not to reproduce every microscopic detail. It is to make the scientifically important relationships visible.
Finally, students follow blood’s response to injury
The fourth part brings the components back together in an injury-response sequence. Students can move from healthy tissue to vessel damage, formation of a platelet-and-fibrin seal, swelling, white blood cell cleanup, and continued exchange with living tissue.
This was probably the most heavily revised section. Early versions had tissue backgrounds that were difficult to interpret. Labels overflowed their boxes. The swelling needed to be more obvious. The first attempt at bleeding looked less like blood escaping from a damaged vessel and more like a red snake climbing through the wound.
That criticism led to a much better model.
The injury now shows translucent plasma filling the wound while recognizable red blood cells, a white blood cell, and platelet fragments move through it. Upward arrows communicate active leaking. Once the platelet-and-fibrin seal forms, that movement stops and the leakage fades. For a skin injury, a dark surface scab begins to form. The later stages exaggerate redness and swelling enough for students to notice the change while preserving the distinction between leaking blood and plasma-related tissue fluid.
Most importantly, the model stops before cell division and tissue rebuilding. This simulation is about what blood contributes to the response: limiting blood loss, delivering oxygen and nutrients, removing carbon dioxide and wastes, producing swelling through fluid movement, and supporting immune cleanup.
The tool improved because the criticism became more specific
This simulator was developed through a long back-and-forth process with AI, but it was not a one-prompt creation. The useful work happened in the revisions.
“Make it more realistic” was a starting point. The tool became better when the feedback became more precise: the capillary does not match the tissue; the blood cells are not following the vessel; students cannot tell which direction the materials are moving; this label does not fit; the swelling is too subtle; the wound does not look like it contains plasma and cells; a scab should appear only at an exposed skin surface.
AI handled a great deal of the coding and visual construction, but the instructional decisions came from repeatedly asking what a seventh grader would actually understand from the screen. The process looked less like ordering a finished product and more like working with a very fast design partner that still needed clear scientific and pedagogical direction.
That is probably the larger lesson for me. The quality did not come from accepting the first functional version. It came from being willing to say, “This works, but it does not teach the idea clearly enough yet.”
From reading about blood to using blood as evidence
I am not removing the reading from the lesson. Students still need language, diagrams, discussion, and opportunities to explain their thinking. The simulator is not a replacement for those pieces. It gives them something concrete to reason from.
Students can now observe blood at different scales, separate its components, follow what it transports, and model how those components respond when a vessel is damaged. They can record observations in an evidence log and use those observations to explain why blood must reach skin, muscle, and bone—and why several blood components must work together after an injury.
The boring blood text was not wrong. It simply could not do all of that by itself.
Now the lesson has a working system students can investigate.
Explore the simulation: Blood: A Working System — Interactive Virtual Lab
Follow the larger curriculum project: Modifying OpenSciEd Unit 6.6: Injuries and Healing
