Unit 6.6: Lesson 3
PIRL EXPERIMENTAL / OPENSCIED IN MY CLASSROOM · UNIT 6.6
How I Teach Medical Images
Reading the words, reading the visuals, and judging the argument
How an OpenSciEd 6.6 lesson became an early-year practice in annotation, scientific reading, evidence, explanation, and argument evaluation.
Medical imaging turned out to be useful for a reason I did not fully anticipate when I planned this lesson. The content was accessible enough that students could spend more of their energy learning how to read science: annotate, use a visual as evidence, explain an idea in their own words, and then decide whether someone else's reasoning actually makes sense.
This was also still very early in the school year. We were only a few class meetings into science, so I was introducing classroom routines at the same time I was introducing content. Students were learning how I wanted them to annotate, how I wanted them to use a graphic organizer, and how discussion was supposed to support—not replace—their own thinking.
That changed the purpose of the lesson for me. I did not need students to leave with an encyclopedic understanding of X-rays, CT scans, MRIs, ultrasound, or endoscopy. I needed them to begin practicing the reading and reasoning habits that would matter much more when the science became harder.
Text → Visual → Explain
Students read a short medical-imaging selection from the Core Knowledge Foundation's Cells and Systems reader. I chose it because the text does not ask students to rely only on paragraphs. Photographs, diagrams, medical images, captions, and short explanations all contribute meaning.
That gave me an opportunity to make the visual part of the reading rather than something decorative sitting beside it.
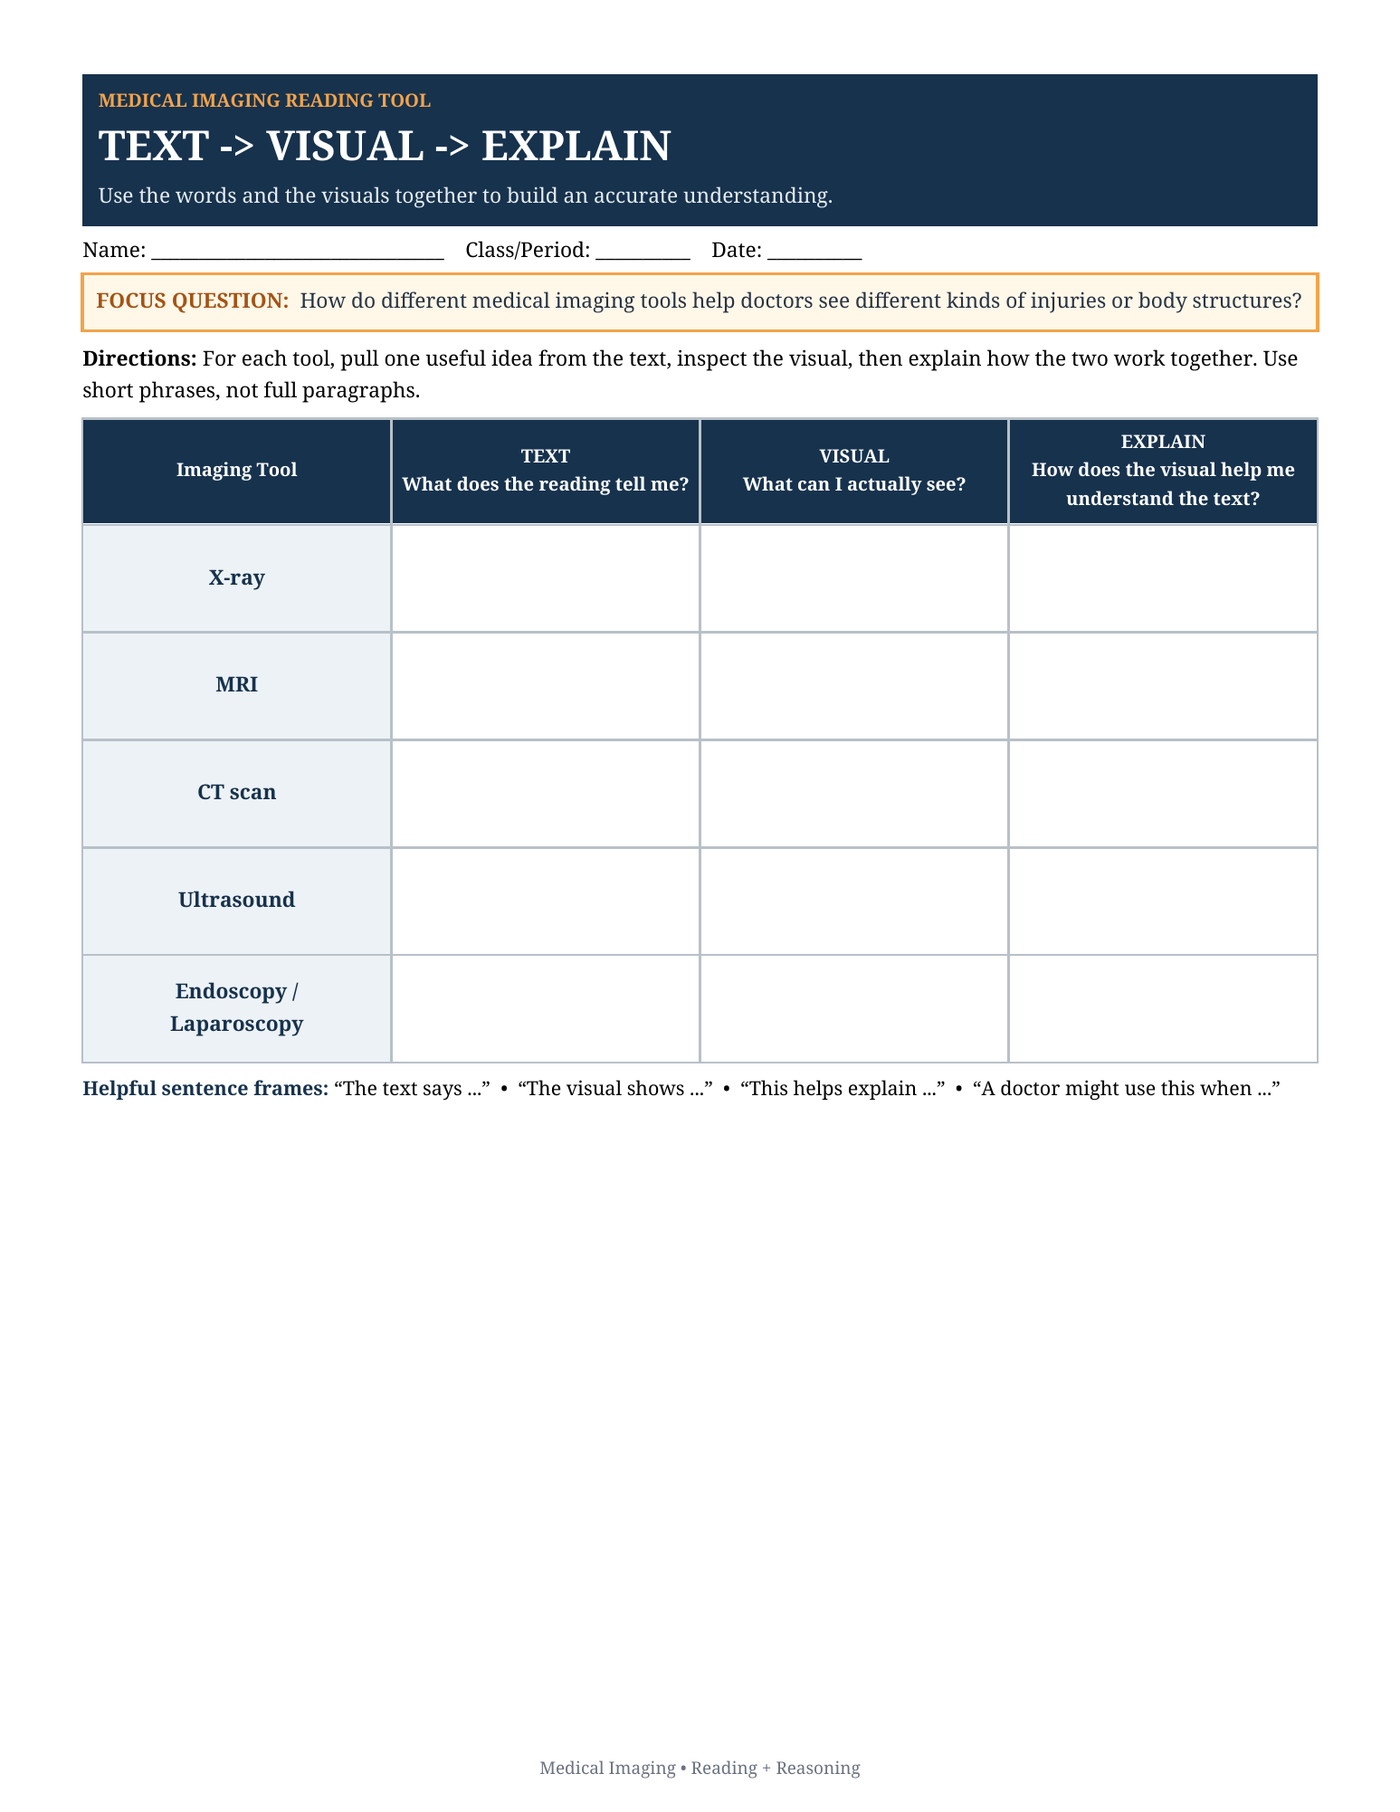
I paired the reading with a simple organizer built around three questions: What does the text tell me? What can I actually see? How do the two help me understand the idea?
 View larger ↗
I liked this structure more than I expected to. Asking students to separate the text from the visual gave them two clear entry points into the reading before they had to synthesize anything.
The Text box essentially asks for evidence from the reading. The Visual box asks students to slow down and describe something they can actually observe. Only after they have done both do I ask them to explain.
That helped prevent some of the vague responses I often get when students jump straight to "What does this mean?" without first identifying what information they are using.
Explain it like you are talking to someone else.
I added another prompt while teaching: How would you explain this to a younger sibling, family member, or someone who had not read the text?
That turned out to be an effective way to get students out of "school answer" mode. Instead of repeating a sentence from the page, they had to decide what the idea actually meant and translate it into language another person could understand.
During our share-out, students were generally able to identify accurate text evidence, describe what they saw in the visual, and explain how the two pieces of information worked together. For an early-year literacy task, that was a useful success.
Use the reading to judge an argument
Once students had information about the different imaging tools, I wanted them to do something with it. Summarizing alone felt like too small an ending.
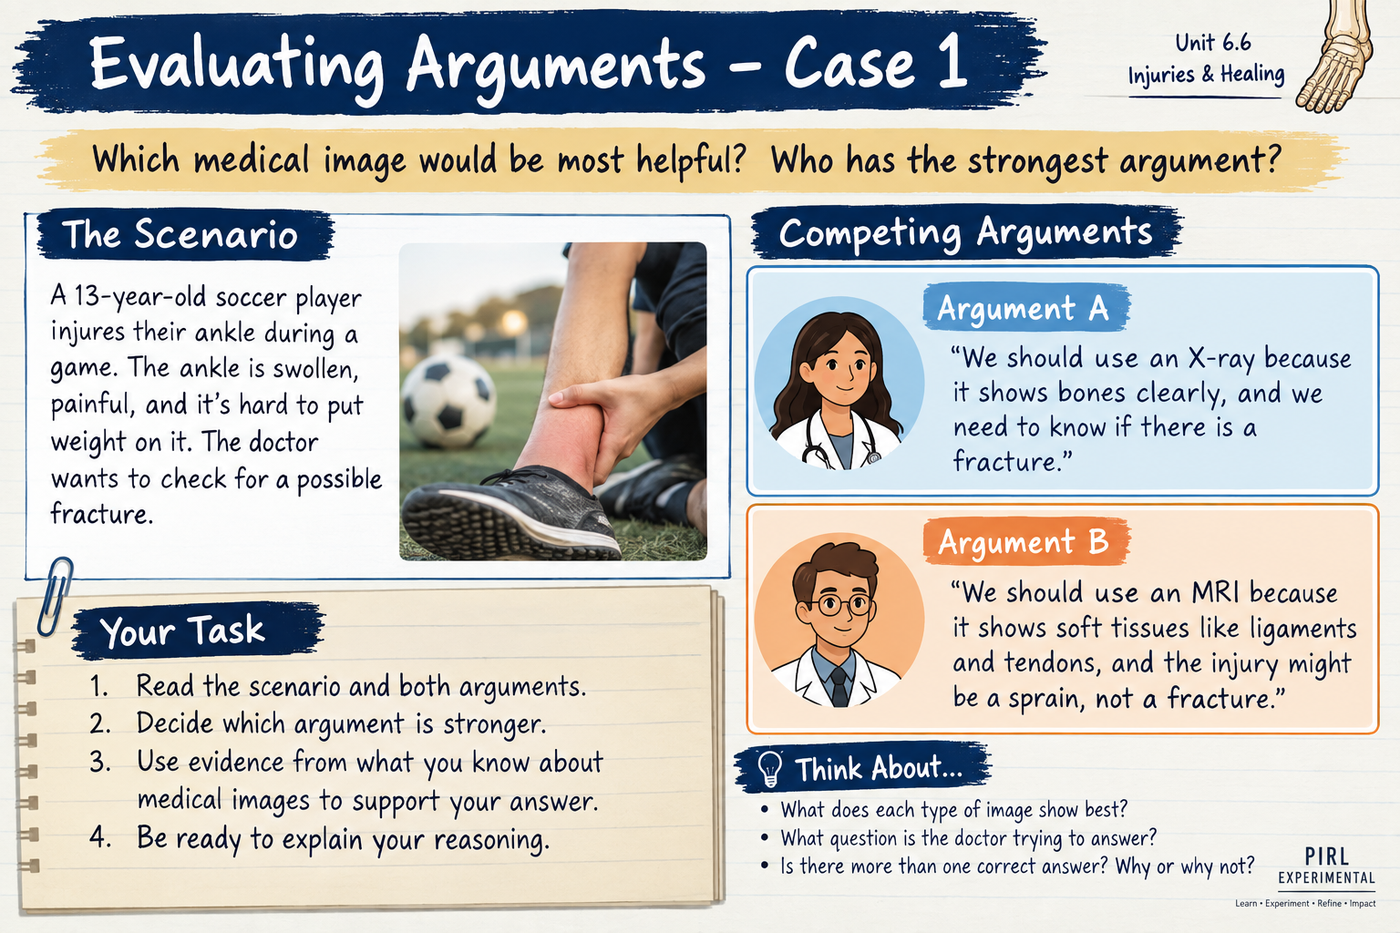
So I moved into four short medical cases. Each case gives students a scenario and two competing arguments about which imaging tool would make the most sense. The cases include a possible ligament injury, a head injury, a suspected fracture, and a situation in which a doctor wants to look directly inside the digestive system.
 View larger ↗
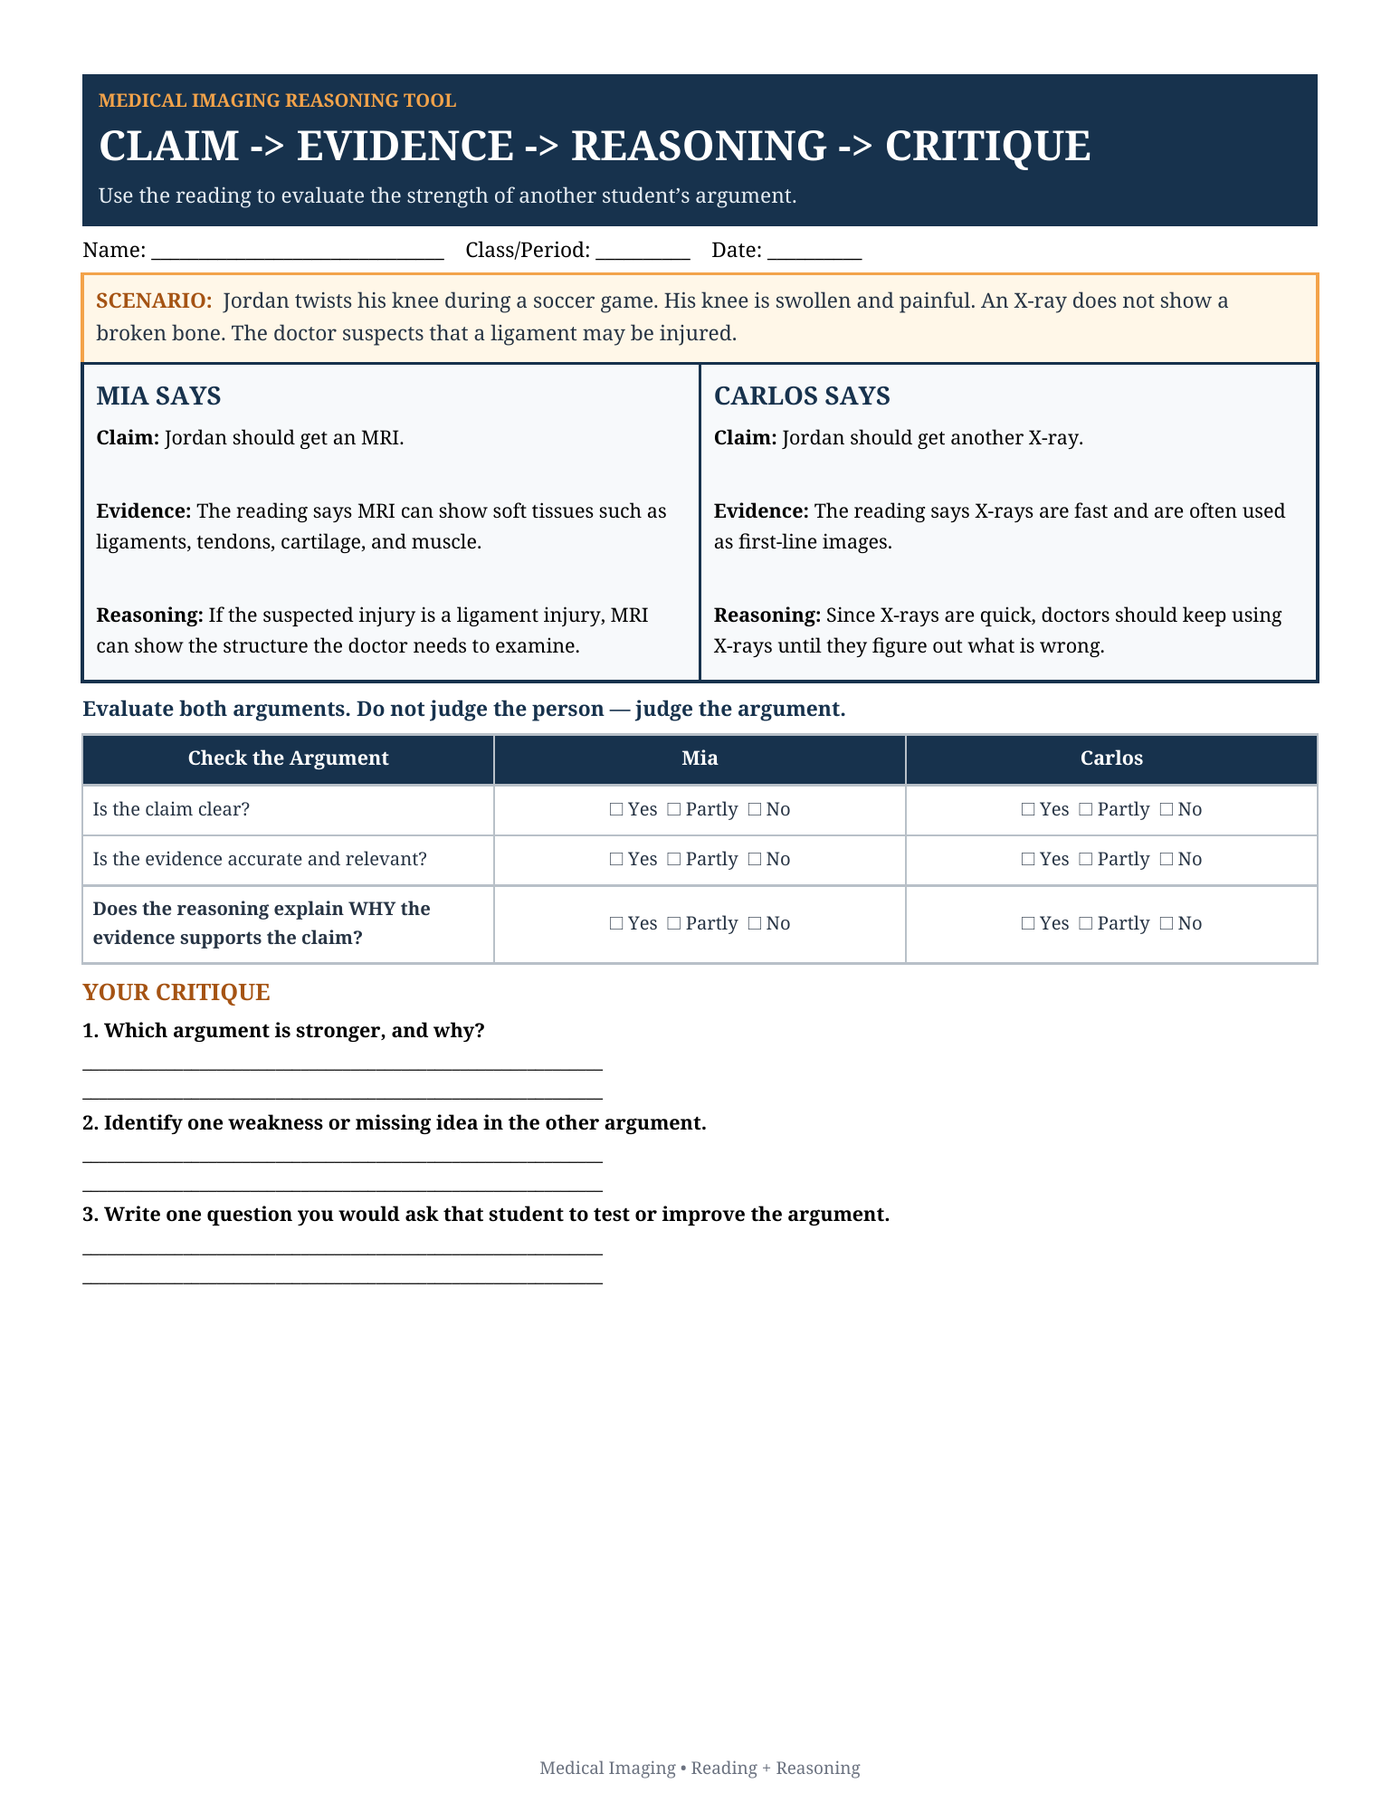
The phrase I kept returning to was: Do not judge the person. Judge the argument.
That distinction mattered. Students sometimes treated an argument as strong because the evidence sentence itself was true. But a true fact is not automatically useful evidence.
For example, "X-rays are fast" may be accurate. If the doctor suspects an injured ligament, however, the more important question is whether that evidence actually helps support the claim being made.
That became the real intellectual work of this part of the lesson: Does the evidence fit this particular situation?
 View larger ↗
This exposed a weakness I needed to teach.
The argument task gave me a much clearer picture of what students could actually do than another comprehension question would have.
Many students could identify a claim and locate a relevant fact. The harder step was explaining why the evidence supported the claim—or recognizing when it did not.
That is exactly the kind of information I want this early in the year. The goal was not for every seventh grader to arrive already skilled at argument critique. The goal was to see where their reasoning was so that I could decide what to model next.
One change I made almost immediately.
My first setup separated students from the reading when they began the argument task. In hindsight, that worked against one of the major purposes of the lesson. If I want students to use evidence, then the evidence should remain available.
In later classes I made sure students kept the source text in front of them. They could return to the reading, verify what an imaging tool showed, and then judge whether that evidence fit the case.
That simple logistical change made the literacy goal much clearer: go back to the source instead of guessing from memory.
Lesson 3 PowerPoint
The slide deck includes the notebook setup and the visual slides I used for the argument-critiquing cases.
Download the Lesson 3 PowerPoint ↗Same science. Different amount of support.
This lesson also became a useful example of what differentiation can look like without creating entirely different science lessons.
I teach everything from heavily scaffolded science classes through Honors. The students can work with the same medical cases and the same underlying science, but they do not all need the same amount of support for the literacy task.
Original / Independent
Students evaluate complete competing arguments and write their own critique.
Download original versionVersion 2
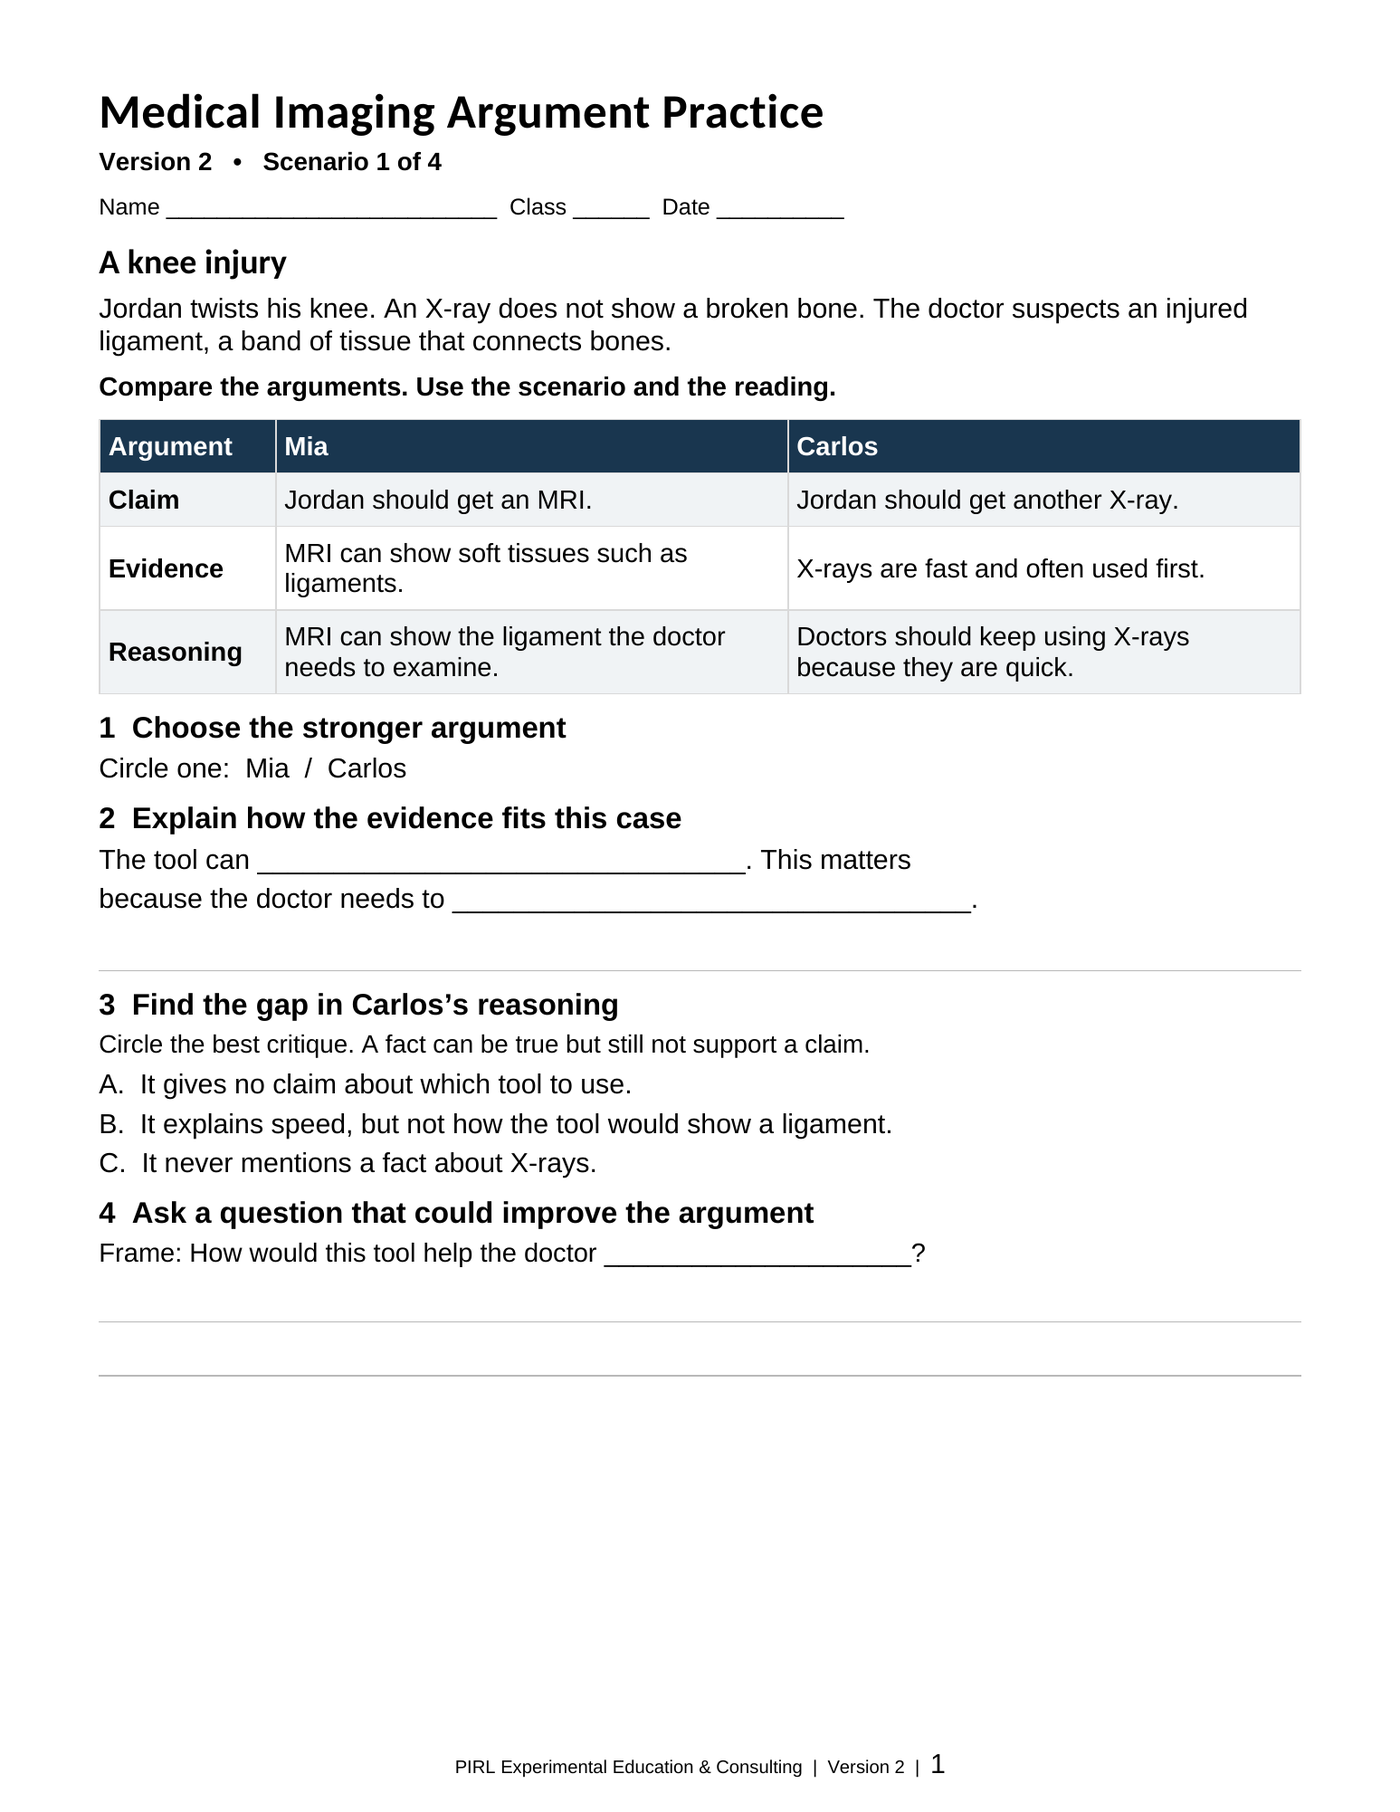
Students compare two arguments, explain the evidence match, choose the reasoning gap, and ask one focused question.
Download Version 2Version 3
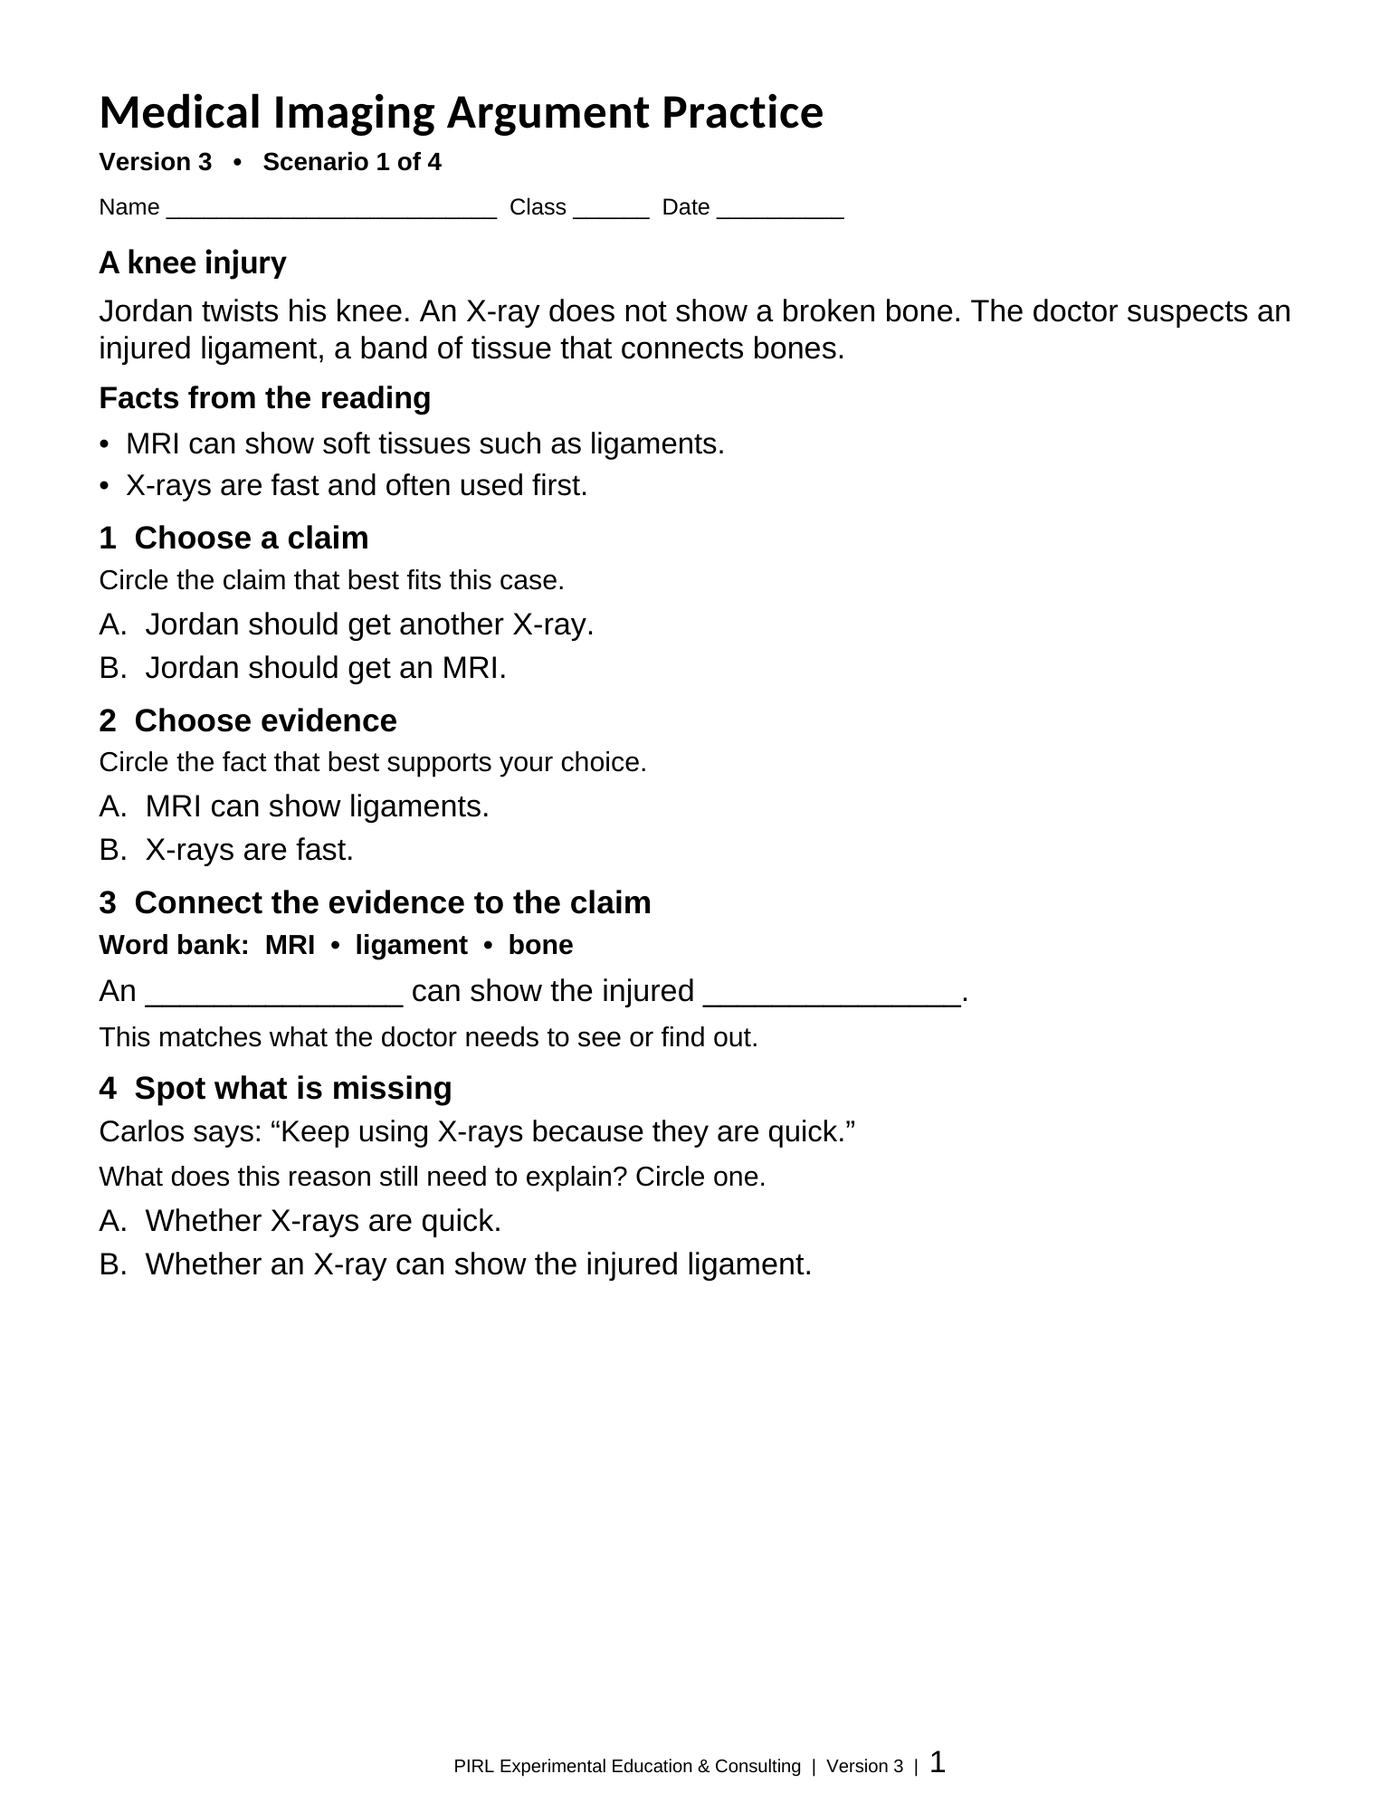
Students choose a claim, choose evidence, complete a reasoning frame, and identify what is missing.
Download Version 3The original version preserves the greatest amount of independence. Students have to look at two complete arguments and decide how well the evidence and reasoning actually work.
Version 2 keeps the same argument comparison but makes the path more visible. Instead of generating every part of the critique, students move through a series of narrower decisions.
 View larger ↗
Version 3 reduces the writing demand further. Students still have to match a claim with relevant evidence and connect that evidence to what the doctor needs to know, but the response is much more structured.
 View larger ↗
What I like about this approach is that I am not changing the central question. Every student is still asking: What does this tool show, and why does that matter in this case?
What changes is the amount of organization and writing the student must manage independently.
The mini-lesson became another differentiation tool.
For classes that needed more support, I used a short mini-lesson to model how I would pull the important information from the text and connect it to a claim. I also used chunking, sentence frames, and more guided discussion.
For Honors, I could remove much of that support. Students could read, determine the important ideas, evaluate the original cases, and complete the progress tracker with greater independence.
The content did not have to change. The amount of thinking I did for them changed.
The lesson needed a cleaner arc
My biggest regret from the lesson was pacing.
I spent too much time at the beginning setting up notebook pages. That was administratively useful, but instructionally it disrupted the lesson before the important work had even begun.
The result was that a lesson I wanted to complete in one class period spilled into a second day. More importantly, I had to end the first day without a real closure.
I do not like that.
I am increasingly trying to build each class period around a complete learning cycle: an opening, one or two meaningful activities, and a closure.
- Open / Explore
- Read + Annotate
- Text–Visual–Explain
- Evaluate Arguments
- Progress Tracker
Next time, notebook setup moves to the end. If there is time, great. If not, the instructional sequence stays intact.
The progress tracker also makes more sense to me as the closure. Students have to move away from the individual task and record what they now understand. That gives me something more useful than simply ending when the worksheet ends.
What this lesson is really for
If I looked only at the title, this would be a lesson about medical images. That is not really how I see it anymore.
Medical imaging is the context. The transferable learning is the process.
Read carefully. Mark the text. Inspect the visual. Return to the evidence. Explain the connection. Decide whether the reasoning actually fits the case.
That is why I still like this lesson even though I would teach parts of it differently next time.
The science is concrete enough that students can enter the lesson quickly. At the same time, the text and visuals are rich enough to practice real scientific reading, and the cases create a natural reason to return to the evidence.
It also gave me an early view into students' literacy and reasoning skills. Some were ready to critique complete arguments. Others needed the reasoning broken into smaller steps. Both groups were working toward the same habit: use evidence for a reason.
That is a skill I can keep revisiting long after we stop talking about X-rays and MRIs.
