Pirl Experimental Education & Consulting
How I Teach It · Injuries & Healing
Turning my classroom
into a bloodstream
Colored beads, practice rounds, surprise germs, and a classroom-sized model of a working system.
One class delivered germs to the brain. They had picked them up at the lungs along with some oxygen and carried them to the next station. Other classes sent nutrients, carbon dioxide, and bacteria to the kidneys. There were traffic jams, mixed-up colors, and plenty of moments when our classroom bloodstream needed a little troubleshooting.
We had a ton of fun with this one. Those mistakes also gave us something concrete to discuss. Instead of only telling students that blood transports materials and responds to injuries, I could point to what they had just done and ask them to think about it.
The question underneath the game
How does blood help every part of the body—and what changes when tissue gets injured?
01 / PRACTICE FIRSTThe change that made the lesson work
I changed the activity so that students practiced each blood role as a whole class before we combined the roles. We took notes on one component, played that role, and reflected on the round. Then we repeated the process with the next component.
That gave everyone a chance to experience the different jobs. A student assigned to be a red blood cell in the final round had already practiced being plasma, a white blood cell, and a platelet.
Our rhythm
Take notes → play one role → reflect → try the next role.
Then combine the roles and see whether the system works.
02 / SET UP THE ROOMSetting up the room
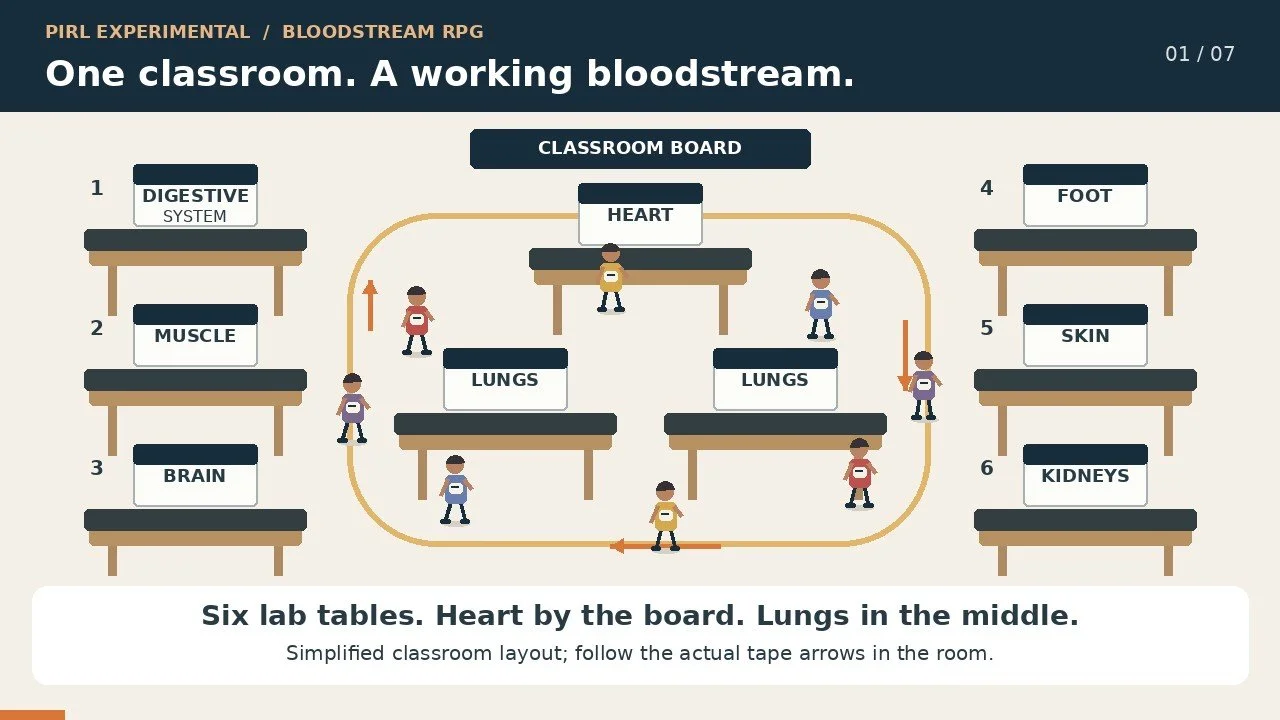
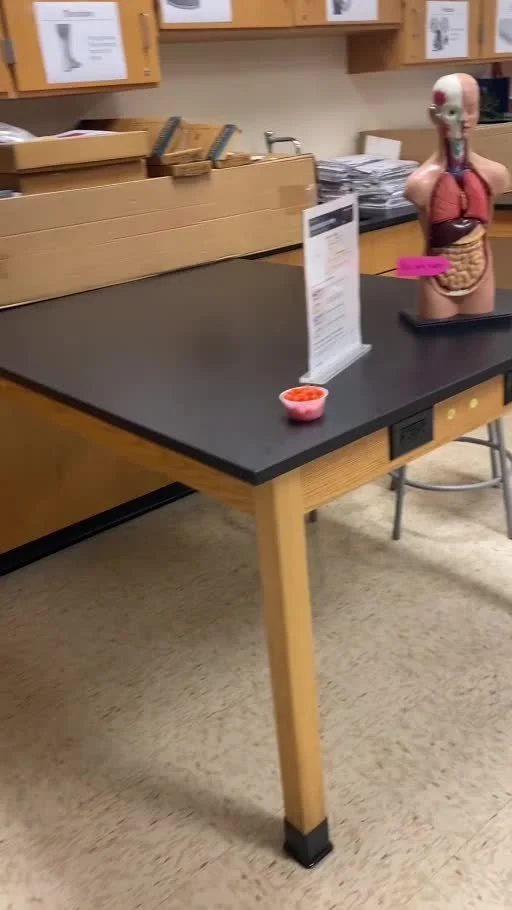
The heart was near the board in the middle of the room. The lungs were in the middle, with the body stations at six lab tables. I used tape on the floor to give students a clear route to follow.
- Digestive system
- Muscles
- Brain
- Foot
- Skin
- Kidneys
The station signs told students what to do at that location; the arrows handled where to go. With a class of up to 26 students, I wanted less route-finding and more attention on the exchange happening at each stop.
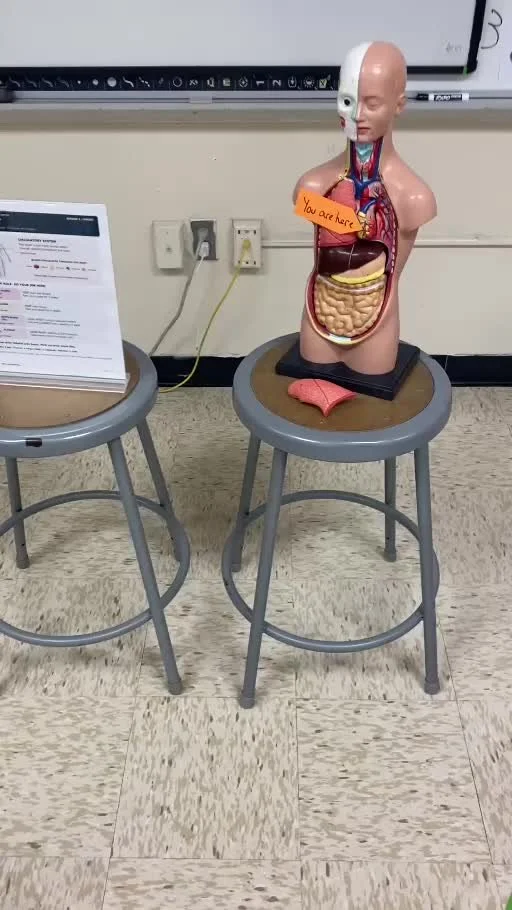
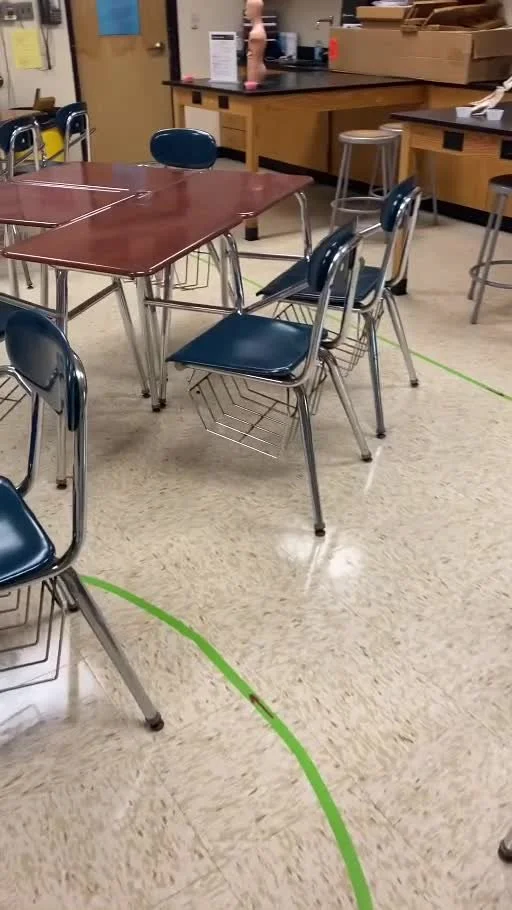
The route is a classroom compromise
Our floor route did not reproduce every step of real circulation. Real blood travels heart → lungs → heart → body → heart. I used a manageable classroom path so students could focus on the jobs and exchanges without a maze of crossing routes.
03 / NOTES & MINI-LESSONA short mini-lesson, then a job to do
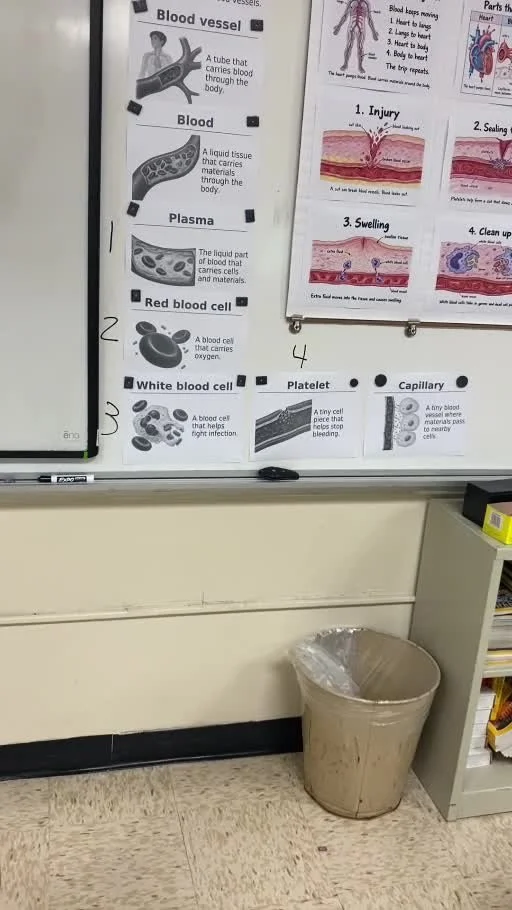
Our notes focused on the heart, blood vessels, plasma, red blood cells, white blood cells, and platelets. The heart pumps. Blood vessels are tubes. The four blood components have different jobs within the same system.
Page 27 held the six-box notes. Page 26 used our Think Like a Scientist routine: Observe; Hypothesize & Explain; Question & Investigate; and Revise & Refine. The notebook gave us a place to connect the activity to the science.
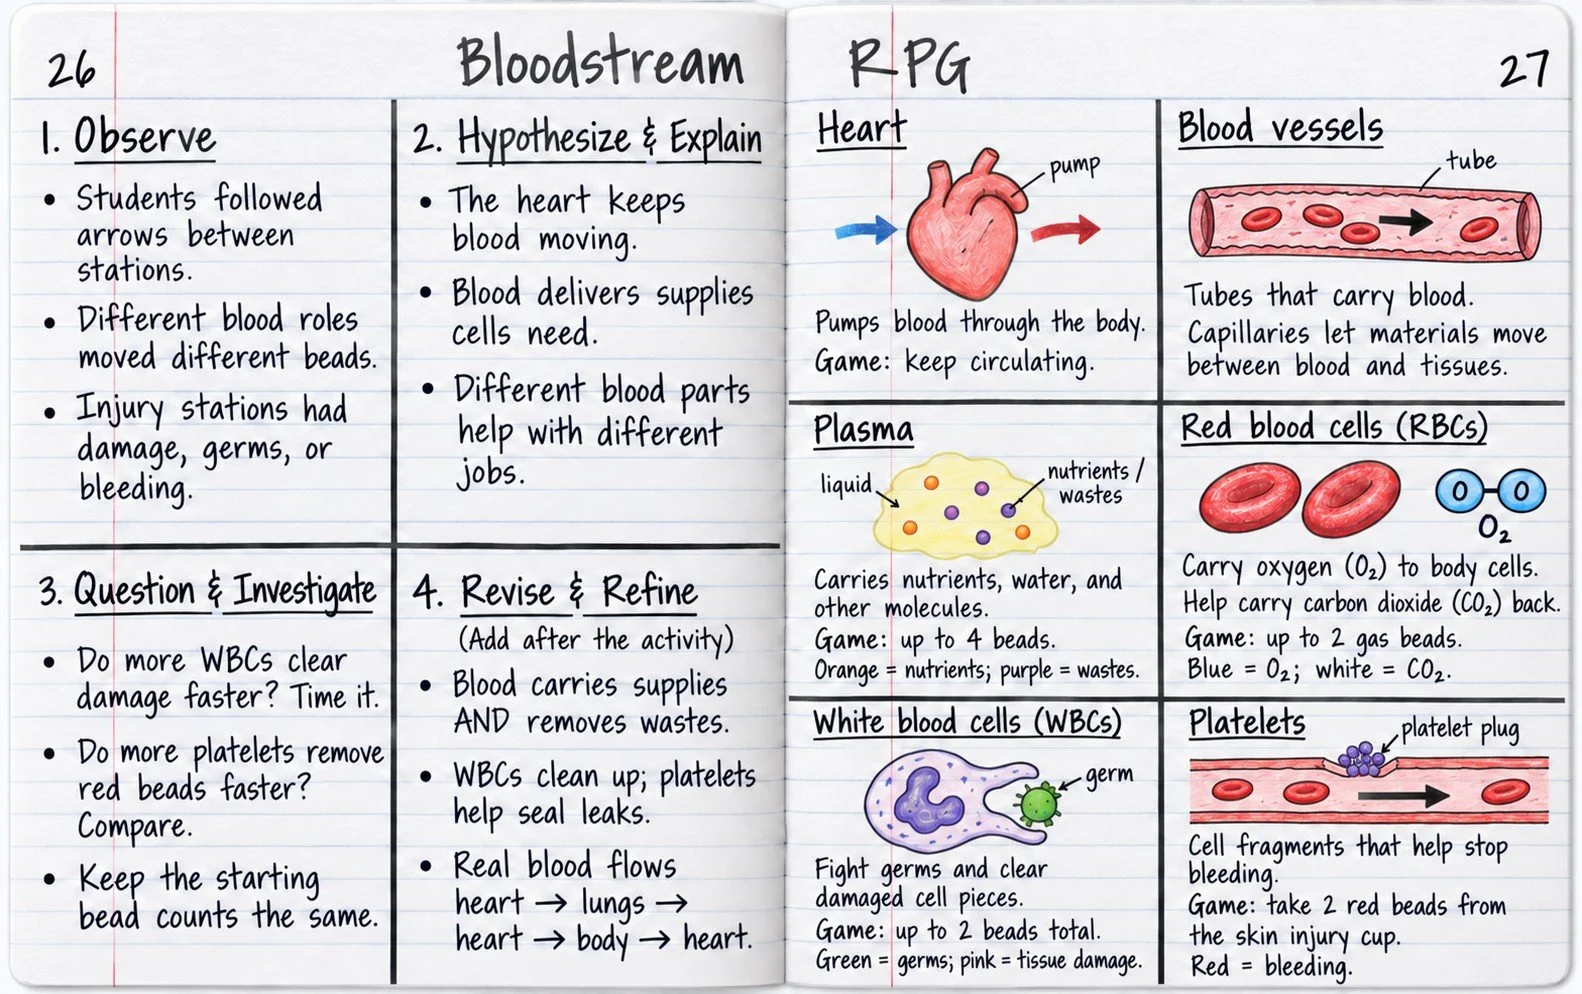
04 / ROLES & BEAD RULESThe beads gave each role something to do
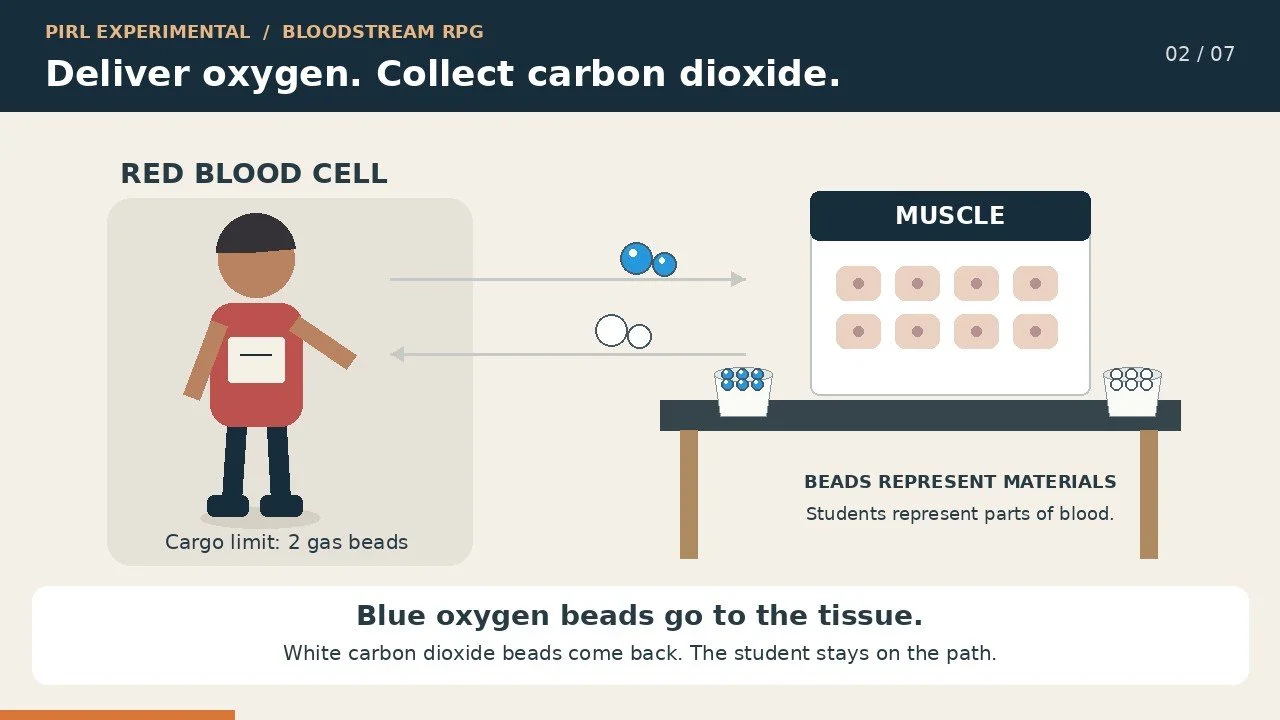
I used colored beads in cups at the stations. The colors made materials visible, and the carrying limits gave students a manageable job. These were game rules, not measurements of how much a real cell can carry.
| Role | What students did | Game limit |
|---|---|---|
| Red blood cells | Moved blue oxygen beads to tissues and white carbon dioxide beads toward the lungs. | 2 gas beads |
| Plasma | Collected orange nutrient beads at the digestive station, delivered supplies, and carried purple waste beads to the kidneys. | 4 beads |
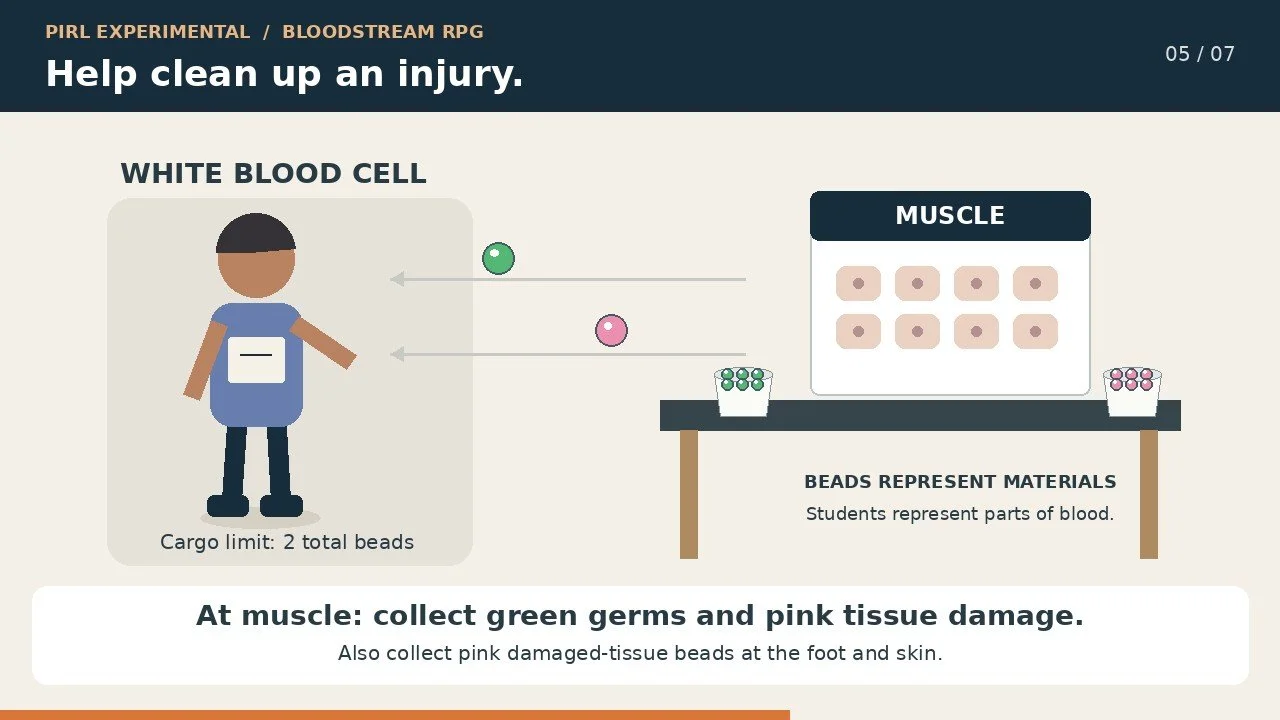
| White blood cells | Removed green germ beads and pink damaged-tissue beads. | 2 beads total |
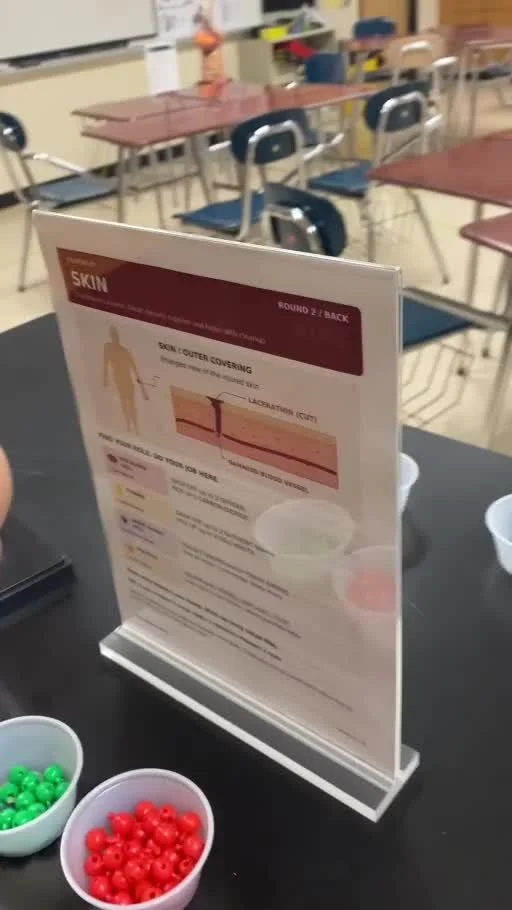
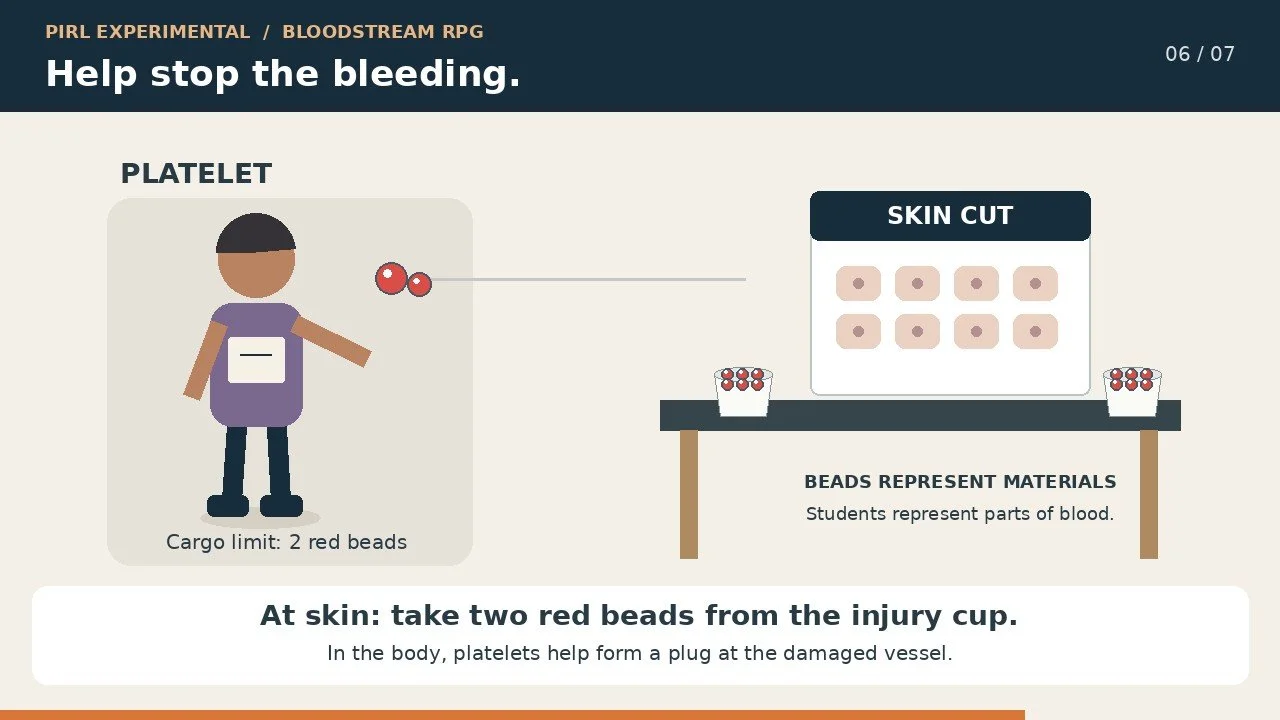
| Platelets | Removed red bleeding beads from an injury cup to represent helping control bleeding. | 2 red beads |
Plasma also carries water and other molecules. The beads represented selected materials, not everything in blood. Removing red beads was our model of controlling bleeding; real platelets help form a plug at a damaged vessel.
05 / FEEDBACK BETWEEN ROUNDSPractice, feedback, and another try
Between rounds, I commented on how the class had done. Did oxygen and nutrients reach all the stations? Were students keeping the colors separate? Did materials end up where they belonged?
I watched for stations being missed rather than expecting every tissue to receive exactly the same amount. Real tissues have different needs. In the game, the useful question was whether our bloodstream was supplying the whole body or overlooking parts of it.
Some classes put nutrients, CO₂, and bacteria in the kidneys. I told them they had caused kidney failure. When students stopped, bunched up, or held up the route, I called them blood clots. The running commentary made our mistakes part of the experience.
Keep the joke—and explain the model
Those comments were playful game feedback, not literal explanations of disease. Kidneys normally receive blood containing nutrients and CO₂. Dropping the wrong beads there does not explain kidney failure. And a traffic jam can model blocked flow, but real clots are made of blood components; they do not simply appear whenever someone pauses.
06 / COMBINE THE ROLESPutting the whole bloodstream together
After practicing the roles, we divided the class among all four components and completed a two-minute circulation round. I used proportions intended to represent the makeup of blood rather than assigning four equal groups.
That was still a classroom approximation. Plasma is liquid, platelets are cell fragments, and a count of students cannot reproduce blood composition by both cell number and volume. The point was to bring the different jobs together and watch the system operate.
07 / ADD THE INJURYThen I added the injury
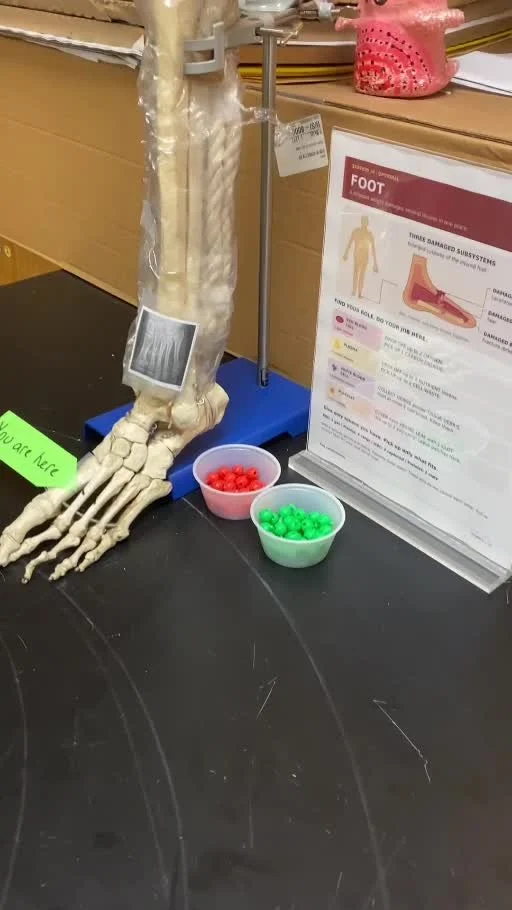
The final round combined the full class with a full injury scenario. The foot, skin, and muscle stations became the places where students encountered the injury materials: pink tissue damage, red bleeding, and green germs. I had added damaged tissue at all three; bleeding and germs gave the platelet and white-blood-cell roles additional work.
I also added a fun wrinkle: germs in the lungs. That was where one class picked up germs along with oxygen and delivered them to the brain. It gave us a memorable example to revisit when we talked about cargo, destinations, and which blood component was responsible for cleanup.
The activity made us keep track of two things at once: the body still needed supplies, and injured areas now needed help.
08 / REFLECT & REFINEThe reflection is part of the game
I did not save all the thinking until the very end. Students reflected after each practice round, and I used the pauses to comment on what I had seen.
The four-box routine gave us a way to move from noticing to explaining. A mixed-up cup was an observation. Explaining which role should have handled those beads took us a step further. Asking whether more white blood cells would clear the same starting amount of damage faster gave us something we could investigate.
For the final discussion, I would return to three questions: What did your role contribute? What happened when that job was not done correctly? Where does our classroom model differ from a real body?
09 / WHAT I WOULD KEEPWhat I would keep—and what I would try next
I would keep the whole-class practice rounds, the visible floor route, and the short feedback conversations. Learning one job at a time gave us a way into a more complicated final round.
I never ended up using the printed tokens, even though I eventually got them printed. The beads were more fun. I will probably try the tokens next time and see how they compare. Recognizable pictures might make the cargo easier to identify, but I want to see whether they keep the same energy as moving the beads.
This lesson gave us something shared to refer back to. When we talk about blood supplying tissue or helping after an injury, we can remember the cups, the missed deliveries, the traffic jams, and the germs that somehow made it to the brain.
10 / THE VIRTUAL LABFrom classroom bloodstream to virtual blood lab
I built Blood: A Working System as a digital companion to this kind of hands-on work. The RPG makes the jobs tangible. The virtual lab lets students look at the system at scales we cannot act out around the room: individual blood components, the vessel wall, and the tissue surrounding an injury.
Students can examine a modeled blood sample, orient themselves in the whole-body circulatory system, trace materials moving between blood and tissues, and follow an early response to injury. Pause and replay controls make it possible to stop at a change, draw what is happening, and connect it to the job they practiced with beads.
How I would connect the two models
Start with something students remember from the game, then ask them to find its counterpart in the simulation. What represented the bead? What represented the student? What can this model show that our classroom route could not?
The annotated screenshots below come from the earlier five-tab tutorial version. Tab numbers and controls may differ between versions; the images show the activities and teaching connections rather than a verified tour of the current live interface.
1. Look closely at blood
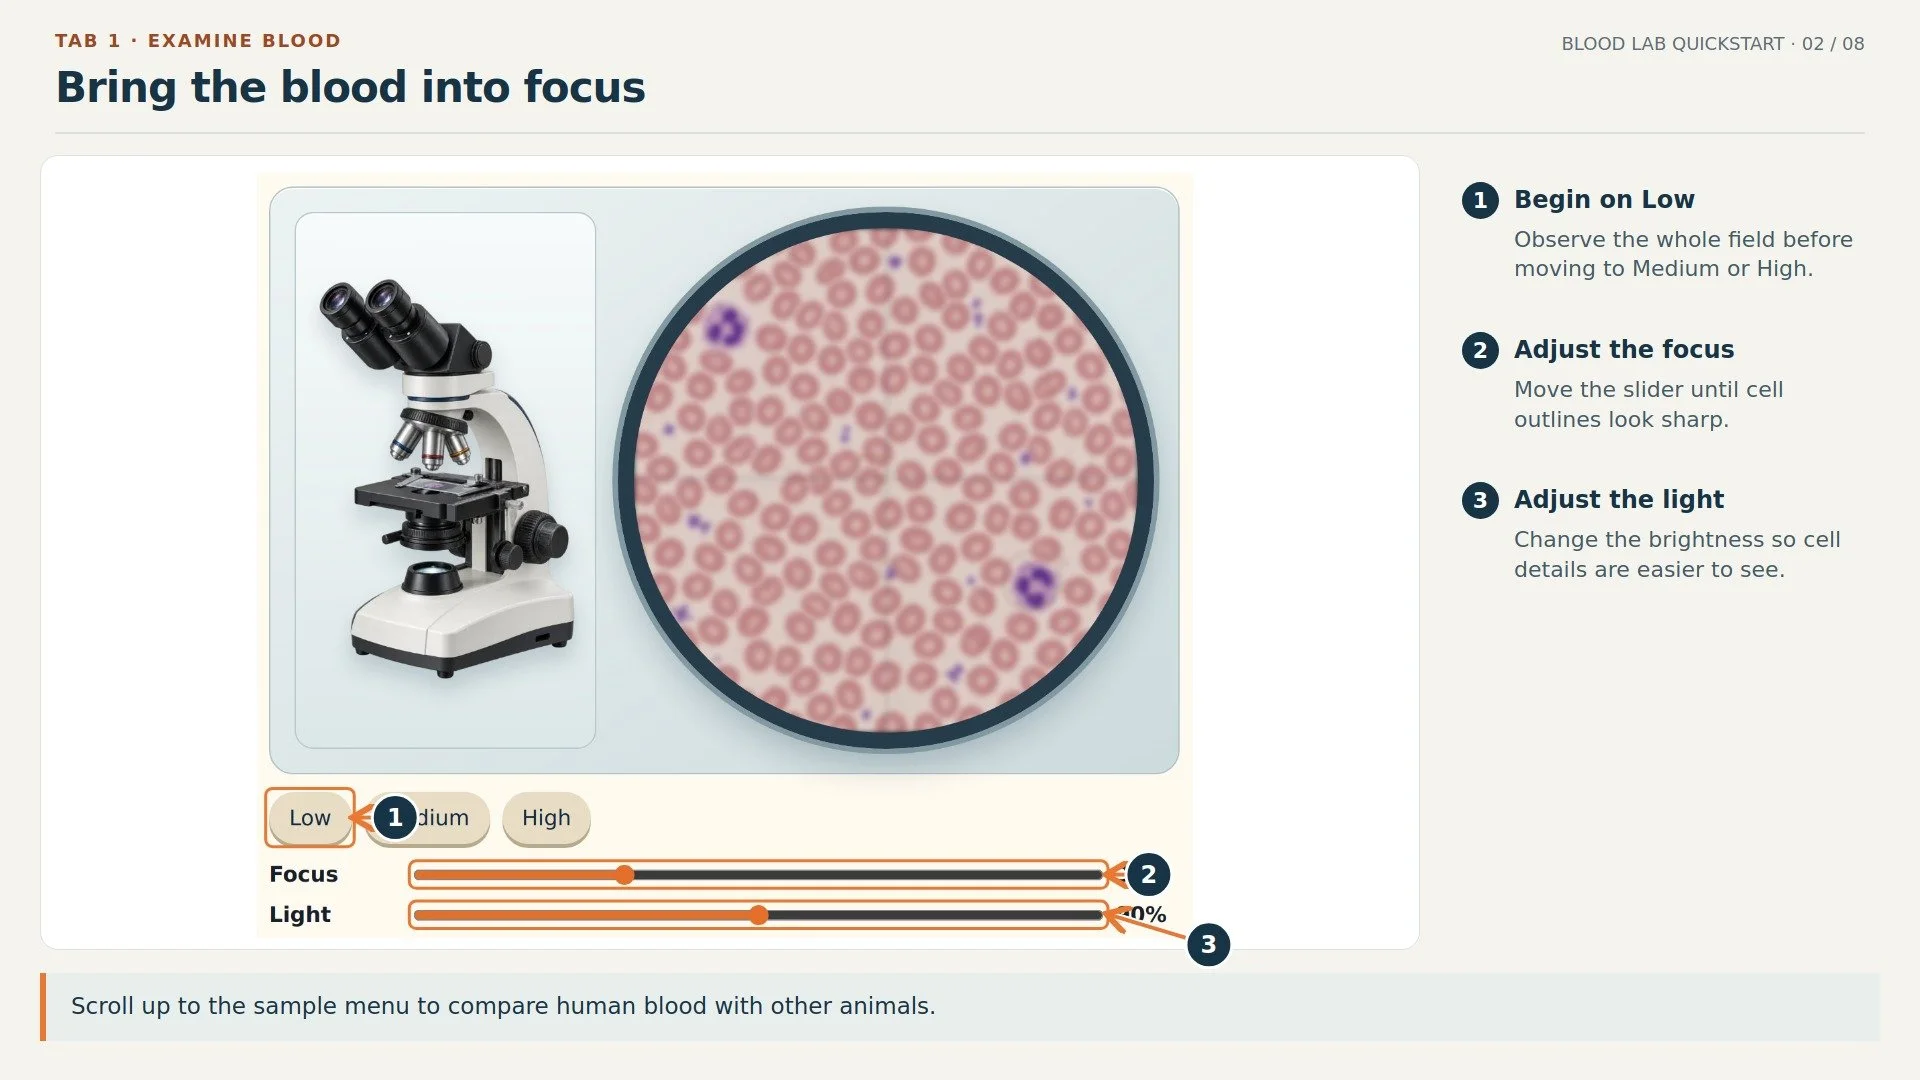
The microscope view connects our four game roles to structures in a modeled sample. Students can change magnification, focus, and light. I would ask: What can you see here that was missing when people represented the blood?
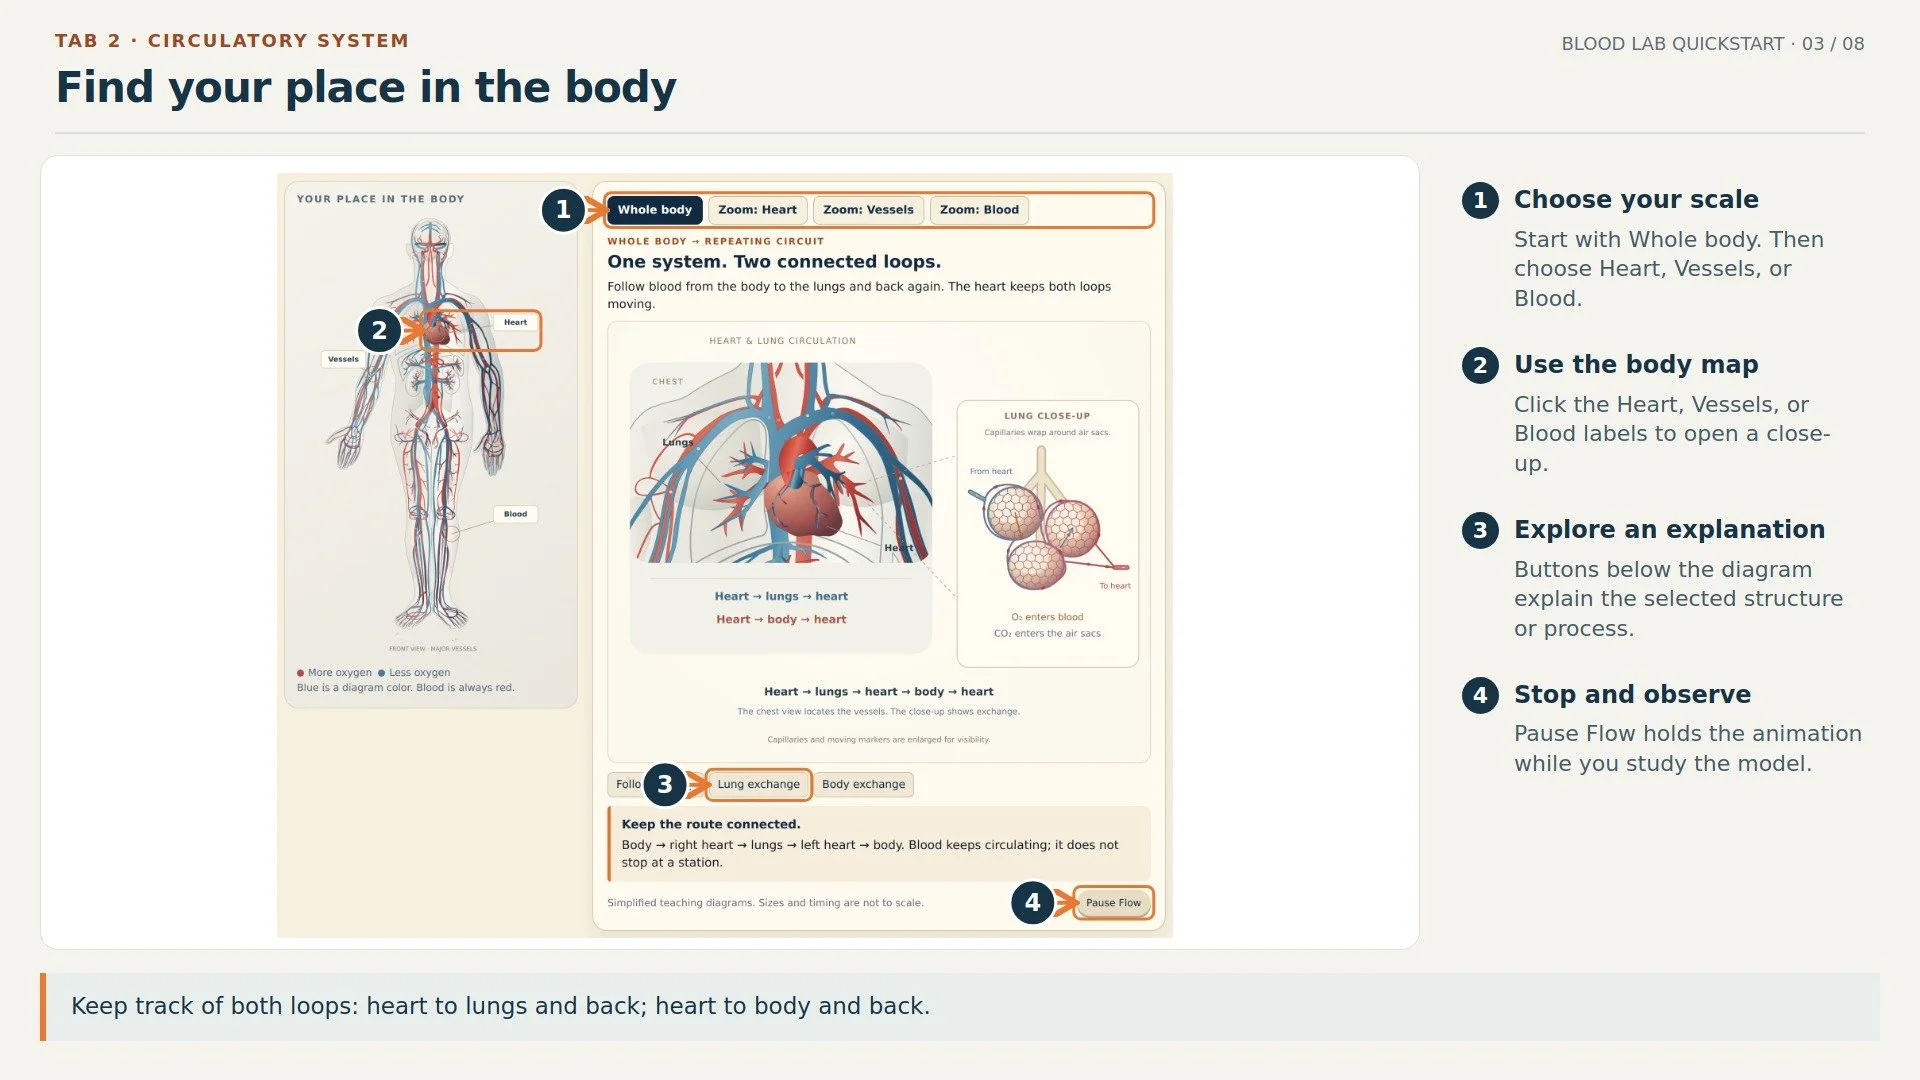
2. Put the classroom route back into the body
The whole-body view connects the heart, lungs, and body tissues. Close-ups let students move between scales. This is a useful place to revisit our simplified floor route and trace heart → lungs → heart → body → heart.
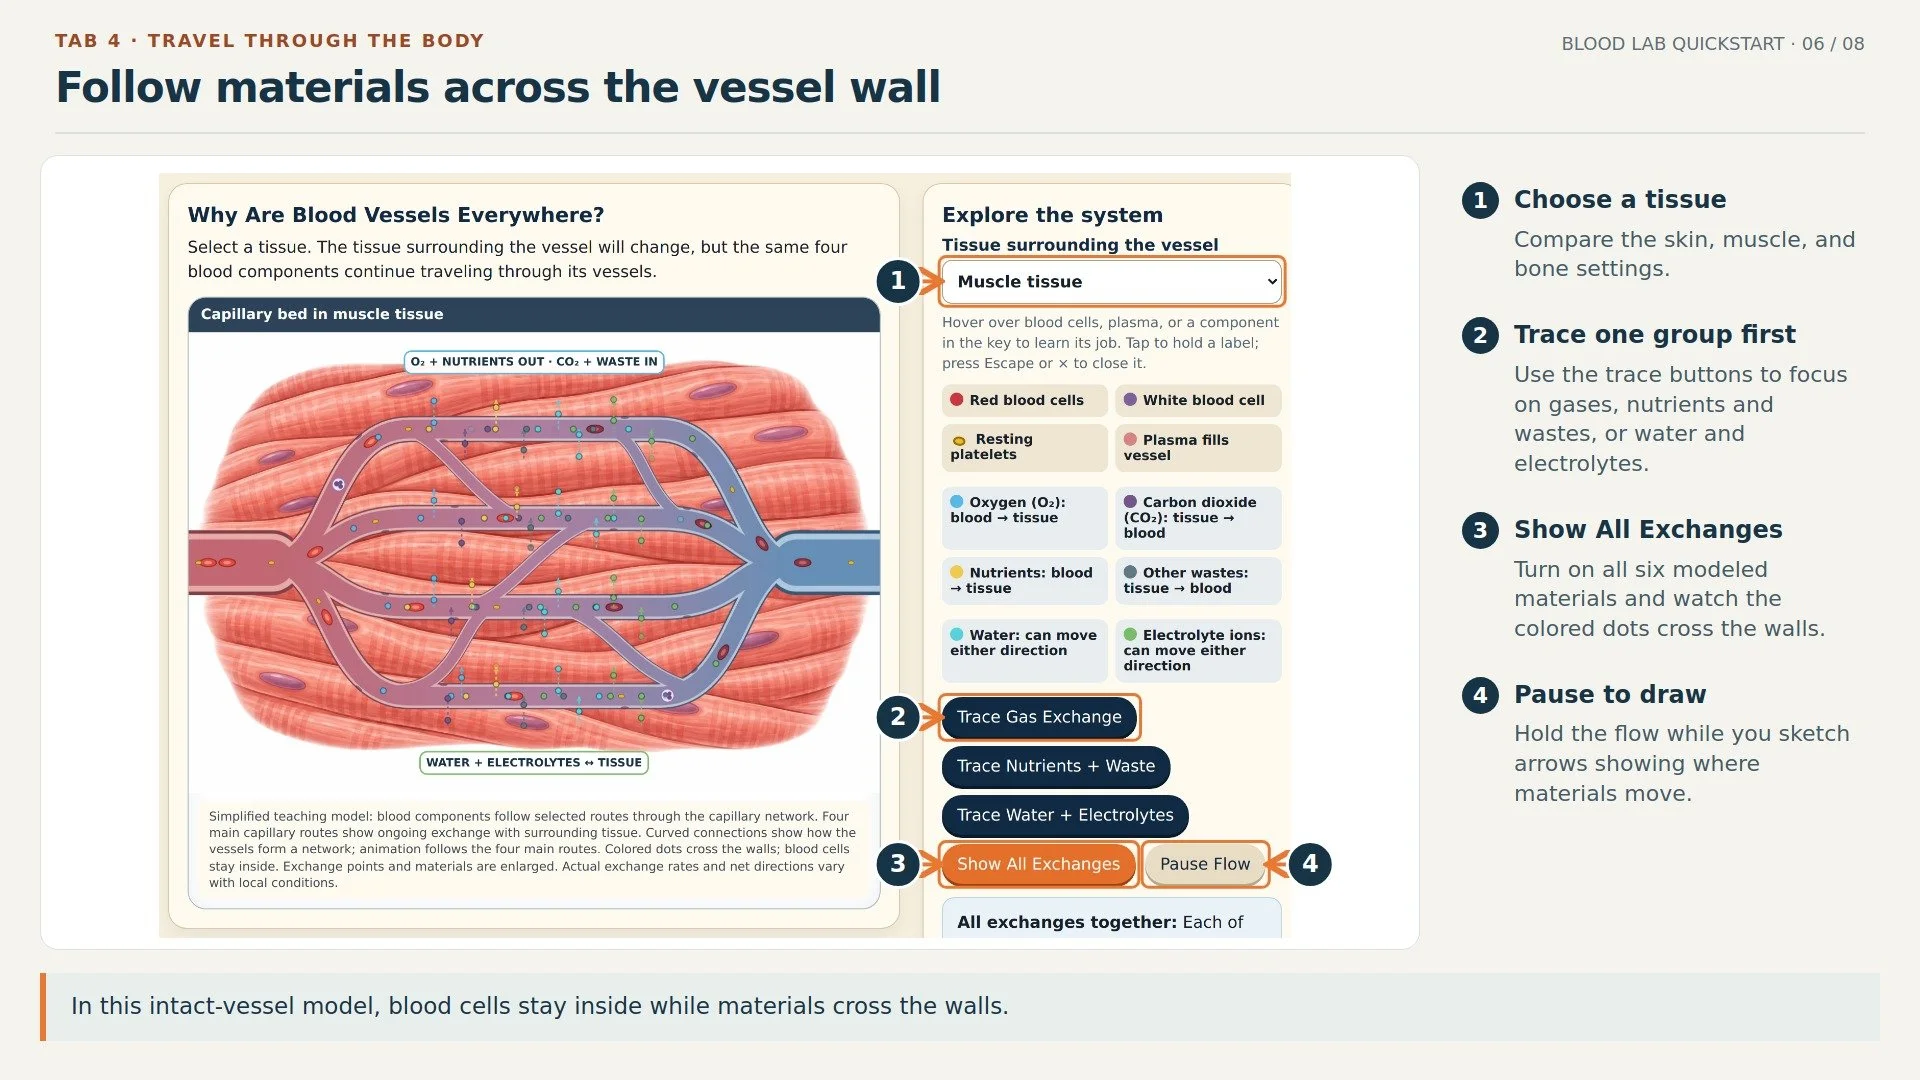
3. Watch the materials cross
At the lab tables, students handed off beads. Here, the model shows materials crossing capillary walls. Students can follow one material group before showing several exchanges together. I would ask: Which way does the oxygen move? Which way does the carbon dioxide move? Does the red blood cell leave the vessel?
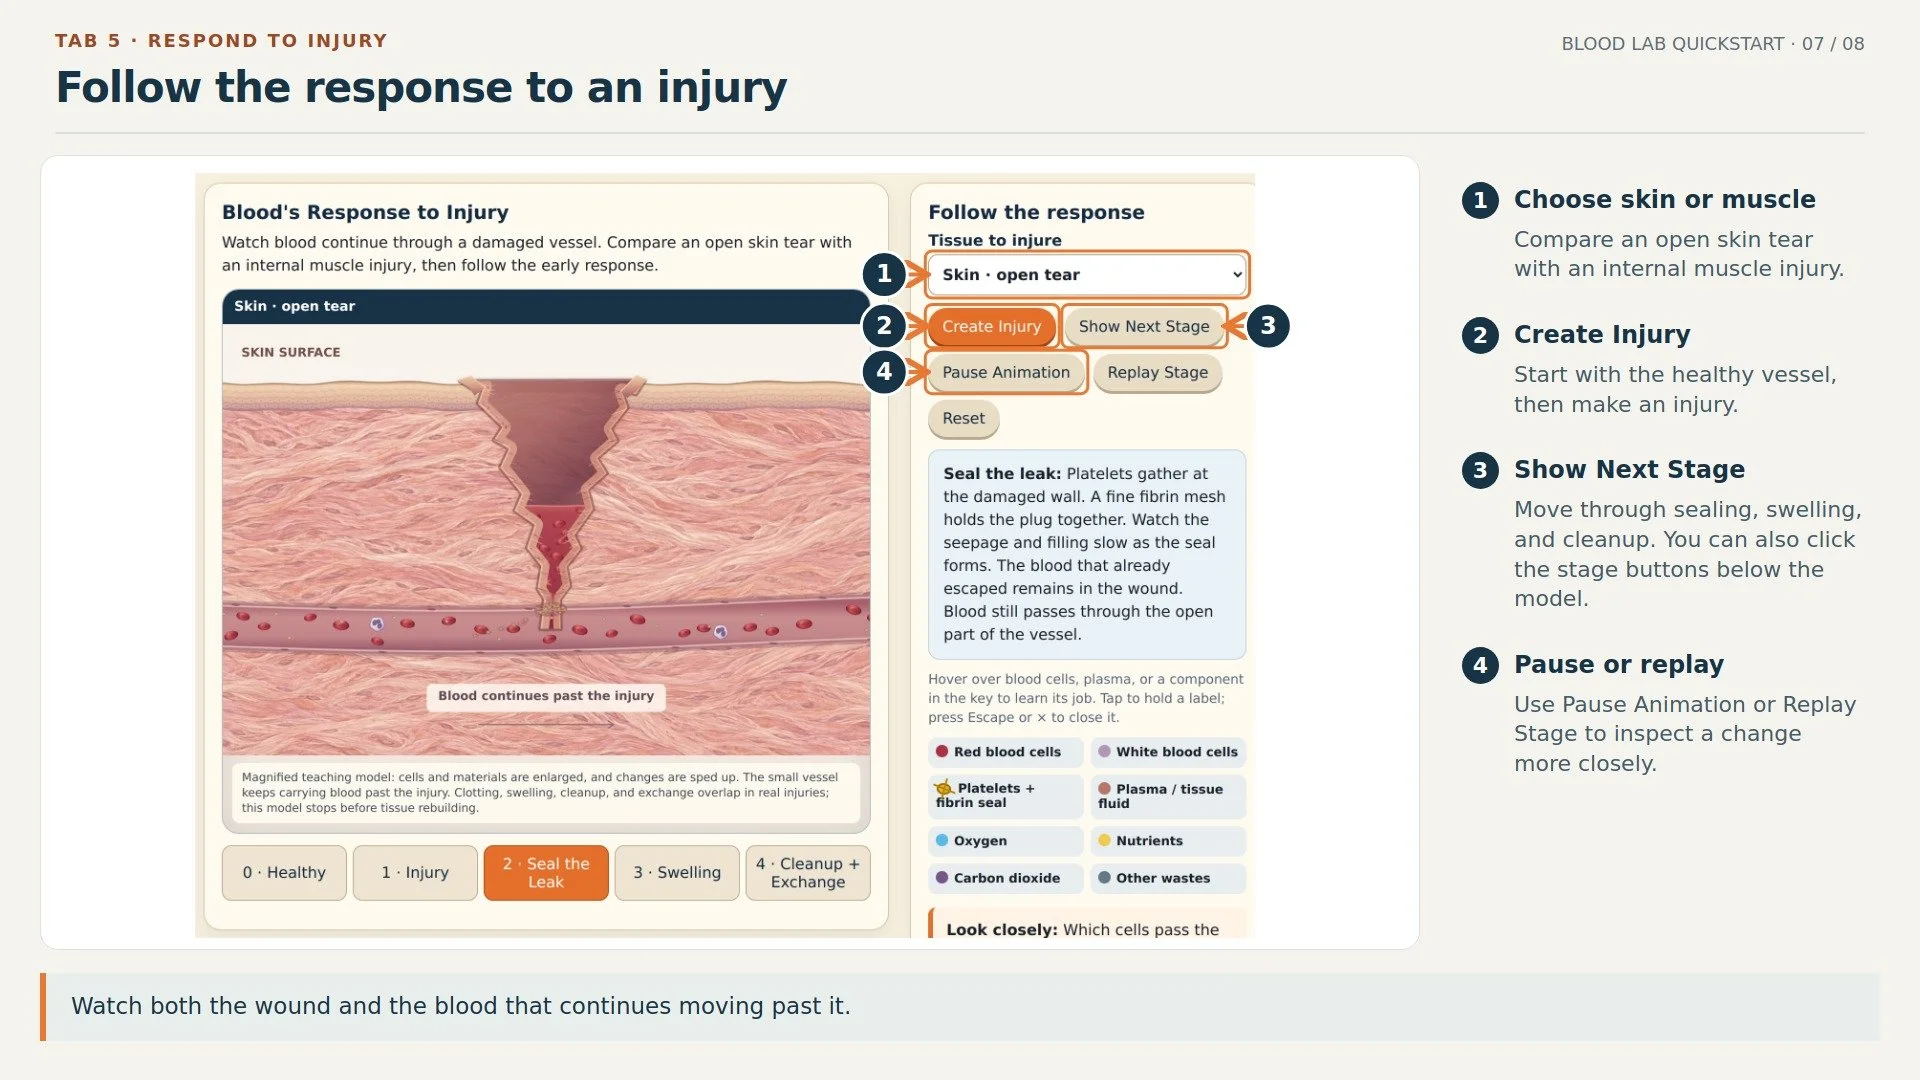
4. Separate bleeding, sealing, swelling, and cleanup
The injury view connects red bleeding beads, platelet roles, and white-blood-cell cleanup to a damaged vessel and nearby tissue. Students can compare skin and muscle, pause a stage, and watch blood continue past the injury. I would ask: What changes at the damaged wall? What enters the tissue? What keeps moving? Real injury responses overlap; the model separates stages to make them easier to observe.
One observation worth recording
Rather than asking students to click through every feature, I would have them choose one exchange or injury response, sketch it, and explain how it compares with the RPG. That gives us something specific to add to Revise & Refine.
I keep teacher materials separate from the student simulation so teachers can choose which resources to share.
11 / LESSON RESOURCESUse the lesson resources
Start with the virtual lab, then choose the classroom materials you want to share with students. The role cards, station printouts, notebook supports, and teacher examples can stay separate from the student simulation.
Image notes: six stills are from my classroom walkthrough. Four are labeled stills from an illustrated recreation. The handwritten notebook is a generated teacher model. Four additional images are annotated screenshots from the earlier virtual-lab tutorial. None is presented as a photograph of students playing. Select any image to open it at full size.
